If Pittsburgh had an animal mascot, I think it would be a squirrel. So, let’s draw a squirrel together.
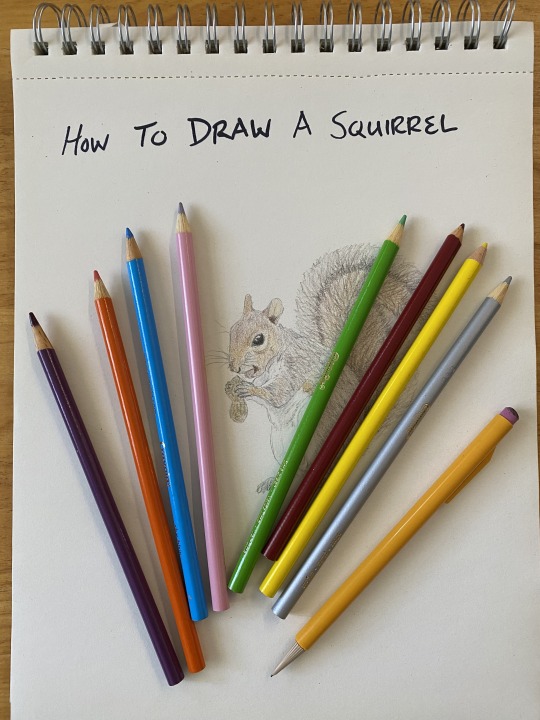
Early naturalists, explorers, and scientists didn’t have cameras to take photos of the animals and plants that they saw. Instead they would draw them so that they could show fellow scientists and the public what kinds of new species they discovered.
One of the many squirrels that live in our area is the gray squirrel. Gray squirrels usually have a grayish or brownish back and a white belly. Some gray squirrels are melanistic—that means that they’re all black—and we call them black squirrels, but they’re actually a gray squirrel.
Before we get started you might need to gather some supplies. Use a pencil and eraser, just in case you make some mistakes (it’s okay to make a mistake). Get some paper and a comfy spot to draw—make sure you cover your table to avoid making marks on it. Don’t forget the colors! I like colored pencils, but you can use markers, crayons, paint, or anything else to color with.
Here’s a tip: try out some ideas on scrap paper so that you know what works best for you. Practice makes perfect!
Step 1: Shapes
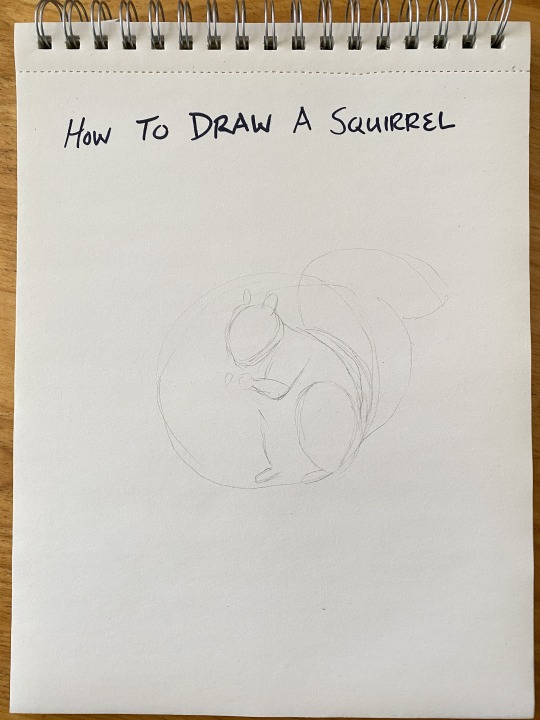
Use some basic shapes—circles, triangles, squares, and lines—to make up the general shape of what you want to draw. Use light pencil strokes so that they’ll be easy to erase later.
Try to keep all of your shapes balanced to one another—you don’t want your squirrel to have a huge head!
I started by drawing a big circle, like a boundary zone, to keep all of the other shapes from getting too big. It doesn’t have to be a perfect circle; we can erase it later.
I also like to have a photo that I’ve taken or found online to use as a reference for what I’m drawing.
If you want to take it to the next level, you can also check out some anatomical and skeletal models of squirrels or other animals online to understand more about their muscle and bone structure.
Step 2: Silhouette
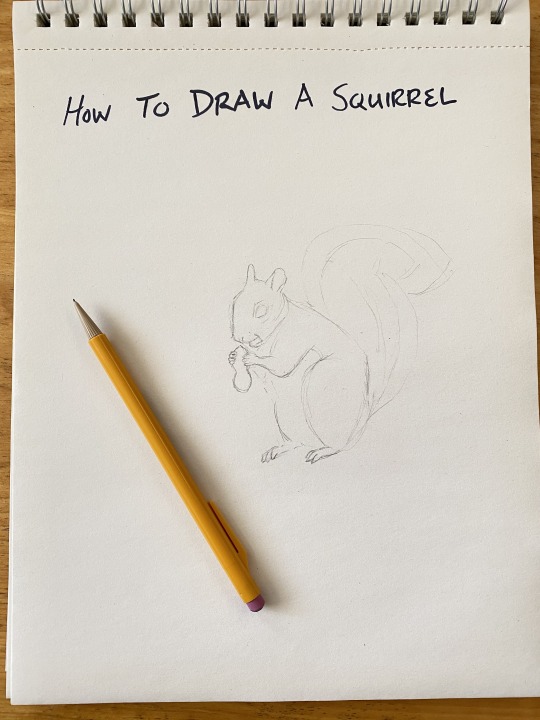
Next let’s connect our shapes so that we can have a good outline of our subject. You can add eyes and some of the rough edges. Try to zone out where your colors will change too—for instance the squirrel’s white belly will be different than its greyish brown back, so I’ll add a line to mark that.
We can also erase that boundary zone circle we made earlier, unless you want to add a colored background for your squirrel.
Let’s also give our squirrel a nut to eat.
Step 3: Details
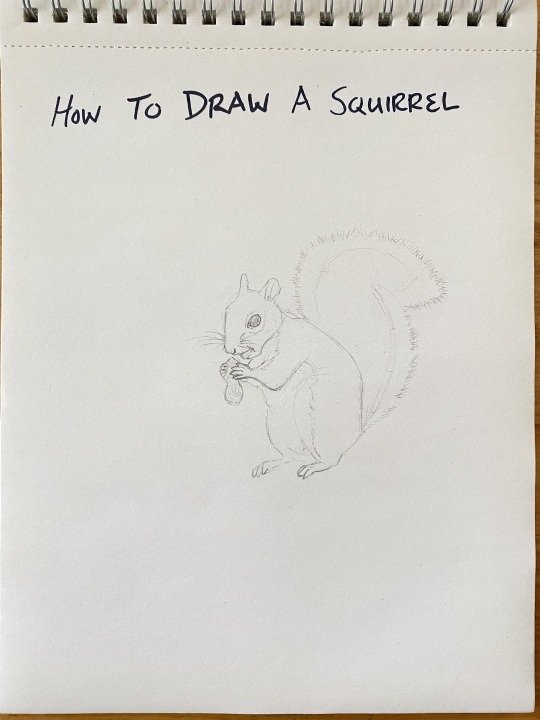
Add more details. Add some furriness to the body, add in details on the ears and face—including some whiskers, and make that tail really fluffy. You can also erase some of those shapes we made in step 1 and feel free to make a few changes to balance it all out if you want to.
It’s also important in this step to know how detailed you want to be. Remember: a smaller sketch doesn’t need as much detail, but a bigger sketch can have more. Whatever you think looks best.
Step 4: Color
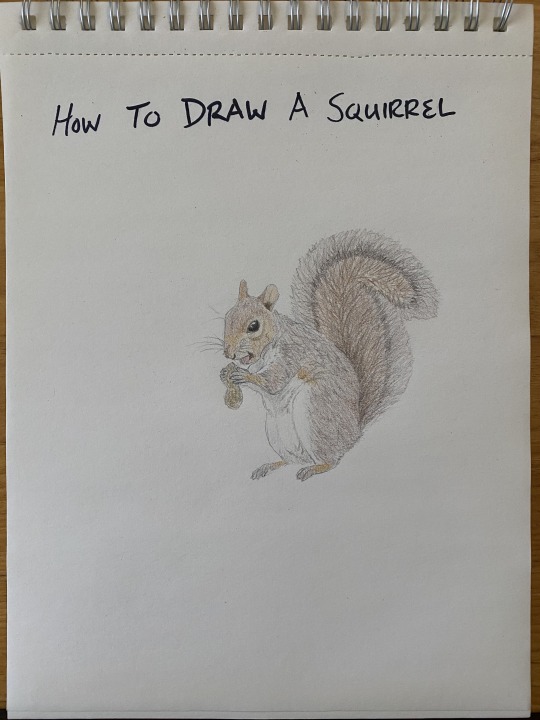
This step is optional, sometimes a black and white sketch can tell a great story. However, if you have some time, then adding color to your drawing can also really bring it to life.
You can use crayons, markers, paint, or any other color tool you want. It’s always a good idea to test your colors on a separate piece of paper to see if they’re right for you or to try out a mix of colors. Squirrels that live in North America are usually brown, black, red, or gray, but there are very colorful squirrels in the tropics. Have fun with it!
Be proud of your sketches! No one else could have made it the same way that you did. By drawing and coloring plants, animals, and other nature you can sharpen your observation skills and gain a better appreciation for the beauty and uniqueness of all life.
Aaron Young is a museum educator on Carnegie Museum of Natural History’s Outreach team. Museum staff, volunteers, and interns are encouraged to blog about their unique experiences and knowledge gained from working at the museum.
