• Skip to primary navigation
  • Skip to main content
  • Skip to primary sidebar

Carnegie Museum of Natural History

One of the Four Carnegie Museums of Pittsburgh

  • Visit
    • Buy Tickets
    • Visitor Information
    • Exhibitions
    • Events
    • Dining at the Museum
    • Celebrate at the Museum
    • Powdermill Nature Reserve
    • Event Venue Rental
  • Learn
    • Field Trips
    • Educator Information
    • Programs at the Museum
    • Bring the Museum to You
    • Guided Programs FAQ
    • Programs Online
    • Climate and Rural Systems Partnership
  • Research
    • Scientific Sections
    • Science Stories
    • Science Videos
    • Senior Science & Research Staff
    • Museum Library
    • Science Seminars
    • Scientific Publications
    • Specimen and Artifact Identification
  • About
    • Mission & Commitments
    • Directors Team
    • Museum History
  • Tickets
  • Give
  • Shop

Megan Jones

September 3, 2019 by wpengine

How to Use a Lensatic Compass

compass open on rocky ground

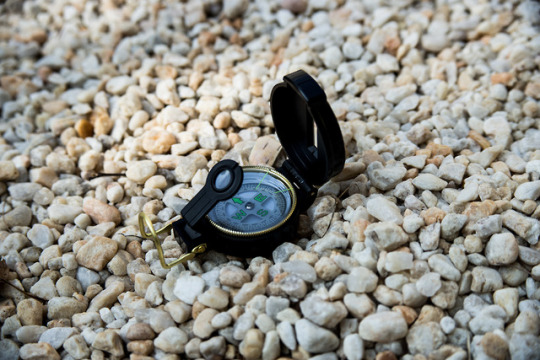
Have you ever heard someone say they need to find their bearings? It dates back to the Age of Discovery and refers to the bearings inside a compass that move the directional needle. That saying has lived on and so has the simple compass! Let’s learn about the military’s preferred version, the lensatic compass. It’s incredibly precise, affordably priced at just a couple of dollars, and easy to find in your local big box or sporting goods store.

What you’ll need

Lensatic compass

Enough room to rotate in a circle

Step 1

closed compass in hand

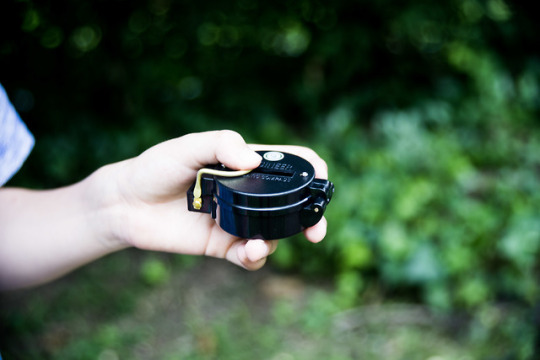
●     Hold the compass in the hand that you write with.

●     Make sure the side facing up has the open slot in the cover.

Step 2

open compass in hand

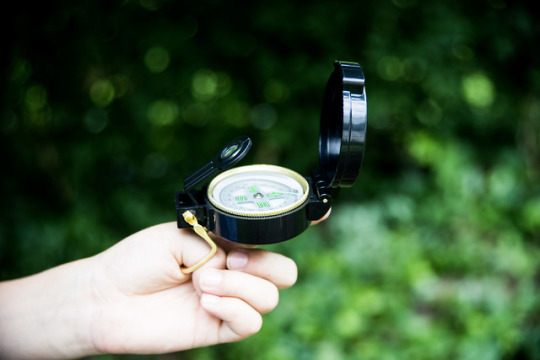
●     Use your thumb to pull the thumb ring back about halfway.

●     Flip up the lid to a 90-degree angle.

●     Flip up the small magnifying glass.

●     Pull the ring underneath the compass and put your thumb through.

●     Wrap your middle, ring and pinky finger around your thumb for support. Use your index finger to steady the front of the compass.

Step 3

open compass in two hands

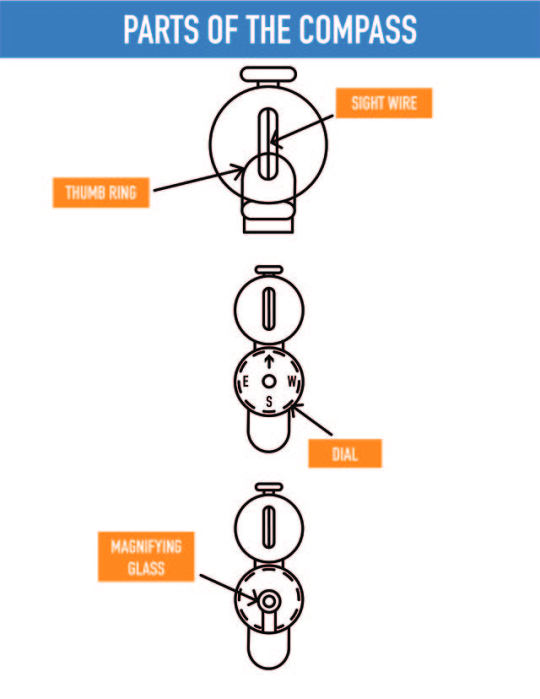
●     Notice the slot in the lid has a sight wire running down the middle.

●     Turn the dial until the larger line aligns with the sight wire.

●     Notice the second line of numbers surrounding the outside of the dial goes from 0 to 360 degrees to represent a full circle. That provides a more accurate direction. Saying an object is at 340 degrees Northwest is more accurate than saying it is Northwest.

Step 4

child reading compass

●     Hold the compass in front of your nose with the lid facing out.

●     Pick an object, rotate your entire body (not just the compass), and align the object with the sight wire.

●     Look through the magnifying glass and find the green line that we matched to the sight wire.

●     Locate the number on the inner dial. You will also see the directions North, South, East, and West. Congratulations, you found your bearings!

●     Pretend your compass is a cool space laser and say “Zzzap!” as you pretend to fire away at your landmark….OK that last part isn’t necessary, but might be fun!

Fun Fact

The lensatic compass is very versatile. You can also use it as you would a standard compass by pulling back the lid and magnifying glass to fully show directions North, South, East, and West. Hold your elbows tight against your body and the compass near your waist to get your bearings and find out which direction you are facing!

parts of the compass diagram


“There’s an app for that”

True, but learning how to read a compass can come in handy.

Do you have a phone or tablet? Look down and check the battery life. How about the WiFi and cellular service? Remember, batteries lose their charge and service can be unreliable in some areas.

Learn this skill in familiar territory like your backyard or a local park.

That way, if you need to use it in unfamiliar territory, you will be ready.

Can you com-pass this text? Give it a try!

Now that you know how to use the compass, let’s put your knowledge to the test! Head into your yard or an outdoors area to begin. Ready? Set? Go!

Locate North. What do you see? _______________

Rotate to the East. What do you see? _______________

Now West. What do you see? _______________

Find South. What do you see?  _______________

Great job so far! Let’s make things a little more challenging by incorporating the degrees.

Locate 340 degrees Northwest. What do you see? _______________

Now turn to 120 degrees Southeast. What do you see? _______________

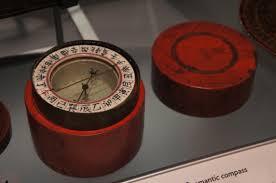
You are now part of a group of navigators that goes back hundreds of years. Research dates the use of the magnetized mineral lodestone as a compass all the way back to the year 1,000. Ancient Chinese explorers learned that they could float the stone on a small piece of wood in a cup of water and the stone would always point to the north pole. Sailors later discovered that rubbing a needle against a piece of lodestone made the needle magnetic and the evolution of the modern compass began, along with superstitions. Prior to the scientific explanation, sailors thought the compass was a magical object that could tell fortunes and cure illness. They also thought that onions and garlic could block the magnetic force, so those ingredients never boarded their ships.

Luckily, we know that compasses today are useful tools that help us find our bearings – no magic required. Congratulations on joining the club of compass navigators!

The ancient Chinese are believed to have created the first compass. This version was used on a ship around 1760.

Blog post by Eddie Phillips. Graphics by Megan Jones. 

Learn more in Nature Lab!

Filed Under: Blog Tagged With: Eddie Phillips, Education, Megan Jones, Nature 360, Nature Lab

August 6, 2019 by wpengine

Spiders as Interior Designers

by Megan Jones
spider hanging from a spider web
A spider meticulously builds an orb web.

Did you know you can recognize a family group of spiders by the way a spider web is designed?  These web-making skills are important to a spider’s survival, and each style helps spiders catch prey in slightly different ways.

There are over 40,000 known species with different types of silk and designs. The most common four spider web designs you’ll see while exploring nature are orb webs, tangled webs, woolly webs, and sheet webs.

Silky Smooth Designs

Orb webs

Orb webs are the classic looking spider webs with a wheel-shape that allows spiders to fully enter a vertical space. Orb webs help attract prey, catching up to 250 insects per day!

drawing of an orb web

Tangled webs

Tangled webs or cobwebs are known for their messy and shapeless design.

These are the webs you’ll see in the corner of an un-swept room. The ends of this web have sticky droplets that help catch unsuspecting prey.

drawing of tangled web

Woolly webs

Woolly webs have a unique texture with adhesive silk. Woolly webs aren’t perfectly made but are usually built horizontally in a geometric shape.

drawing of woolly web

Sheet webs

Sheet webs can be found strung across bushes acting as a maze of silk. When an insect flies into one of the silk strings, it is knocked into a net below where the spider waits for its prey.

drawing of sheet web

Too Much Time On The Web

Spiders don’t just use their silk for web-building. They are known to use their silk as a trail behind them when hunting and as material for creating egg sacs. Some spiders even hang glide by sailing through the sky attached to strands of silk!

What Designs Are Around You?

Although most web designs are done with purpose, some spiders are known to actively decorate their webs. They creatively weave their webs daily. Now that you know what you’re looking for, even your backyard can be an adventure!

tangled spider web on a plant
A tangled web covers a plant in wait for prey to land.

Can You find all four types of webs around you? Draw a picture of each web you find!

Spider webs can be found anywhere. We recommend your backyard, the nooks and crannies of your porch, or even the corners of an undusted room in your house!

Blog post and illustrations by Megan Jones. Photos by Melissa Cagan. Museum employees are encouraged to blog about their unique experiences and knowledge gained from working at the museum.

Related Content

Spiders Catch All Sorts of Insects

Jumping Spiders

Natural History Discoveries

Carnegie Museum of Natural History Blog Citation Information

Blog author: Jones, Megan
Publication date: August 6, 2019

Share this post!

  • Share on Twitter Share on Twitter
  • Share on Facebook Share on Facebook
  • Share on Pinterest Share on Pinterest
  • Share on LinkedIn Share on LinkedIn
  • Share on Reddit Share on Reddit
  • Share via Email Share via Email

Share this post!

  • Share on Twitter Share on Twitter
  • Share on Facebook Share on Facebook
  • Share on Pinterest Share on Pinterest
  • Share on LinkedIn Share on LinkedIn
  • Share on Reddit Share on Reddit
  • Share via Email Share via Email

Filed Under: Blog Tagged With: Education, insects, Megan Jones, Melissa Cagan

sidebar

About

  • Mission & Commitments
  • Directors Team
  • Museum History

Get Involved

  • Volunteer
  • Membership
  • Carnegie Discoverers
  • Donate
  • Employment
  • Events

Bring a Group

  • Groups of 10 or More
  • Birthday Parties at the Museum
  • Field Trips

Powdermill

  • Powdermill Nature Reserve
  • Powdermill Field Trips
  • Powdermill Staff
  • Research at Powdermill

More Information

  • Image Permission Requests
  • Science Stories
  • Accessibility
  • Shopping Cart
  • Contact
  • Visitor Policies
One of the Four Carnegie Museums | © Carnegie Institute | Privacy Policy | Terms of Use | Accessibility
Rad works here logo