Crafts
Meowfest: Why Do Cat Eyes Glow in the Dark?
Have you ever walked around a dark corner only to be surprised by glowing eyes staring back at you? The glowing eyes of a cat at night can sometimes be shocking and even a little scary if unexpected. Ancient Egyptians believed cats captured the glow of the setting sun in their eyes and kept it safe until morning. Ancient Greeks believed there was a light source inside the eyes that was like a gleaming fire. We now know that cat’s eyes appear to glow because they, along with the eyes of many other nocturnal animals, reflect light.
All eyes reflect light, but some eyes have a special reflective structure called a tapetum lucidum that create the appearance of glowing at night. The tapetum lucidum (Latin for “shining layer”) is essentially a tiny mirror in the back of many types of nocturnal animals’ eyeballs. It basically helps these animals see super-well at night. It is also what causes the glowing eye phenomenon known as “eyeshine.”
How Does It Work?
When light enters a cat’s eye, it can take a few routes. Some of the light directly hits the retina, a layer at the back of the eyeball containing cells that are sensitive to light. These photoreceptor cells trigger nerve impulses that pass via the optic nerve to the brain, where a visual image is formed.
Some of the light passes through or around the retina and hits the tapetum lucidum. The tapetum lucidum reflects visible light back through the retina, increasing the light available to the photoreceptors. This allows cats to see better in the dark than humans.
In the last route, some of the light that bounces off the tapetum lucidum, misses the retina, and bounces back out of the cat’s eyes. This reflected light, or eyeshine, is what we see when a cat’s eyes appear to be glowing.
Do Humans Have a Tapetum Lucidum?
Though our eyes have much in common with cats’ eyes, humans do not have this tapetum lucidum layer. If you shine a flashlight in a person’s eyes at night, you don’t see any sort of reflection.
The flash on a camera is bright enough, however, to cause a reflection off of the retina itself. This is the infamous “red-eye” in photographs. What you see is the red color from the blood vessels nourishing the eye.
Activity
In this two-part activity, you will be able to see how the tapetum lucidum works and then simulate how this reflective layer helps cats see well at night.
Materials Needed
Directions
- Make about a hole in your paper or cardboard using a pencil or pen. It does not have to be perfect! If using a thinner paper, try folding it a few times before making the hole (the harder it is to see light through, the better!).
- Hold the cardboard about 6 inches away from a blank wall and shine the flashlight through the hole toward the wall.
- Without looking directly into the light, glance at the side of the cardboard facing the wall. Take note of what you see.
- Repeat steps 2 and 3 while using your mirror instead of a wall. Again, avoid looking directly into the light or its reflection in the mirror! Note the difference in light on the side of the cardboard facing the mirror.
Imagine that the cardboard is a retina and the mirror is a reflective layer like the tapetum lucidum. What happened to the “retina” when the mirror was used instead of the wall?
This experiment shows how the amount of light from a singular light source is doubled when a reflective layer is present. Thus, it shows us how having a reflective layer—like a tapetum lucidum—increases the amount of light information available.
Materials Needed
Directions
1. Place your glass container about 6 inches away from a wall.
2. Shine your flashlight through the glass toward the wall and observe how the light appears on the wall.
3. Fill the container with water and place in the same spot as before.
4. Shine your flashlight through the glass toward the wall and observe how the light now appears on the wall.
Imagine that the wall is the retina and the water is a reflective layer like the tapetum lucidum. How does the reflective layer change the presence of light on the retina?
While this experiment is technically showing how light refraction works in water, it can also show us how having a reflective layer—like a tapetum lucidum—increases the amount of light available to cats’ eyes. Also, that the extra reflective light is not as clear as the original light input.
A Bumble’s Blog and Bumble “Weee” Catapult Craft
Wander outside in the spring and summer and I bet you will bump into a busy bumble bee bumbling among the wildflowers. Bumble bees (Bombus sp.) are rather rotund, fuzzy bees usually with black and yellow-orange stripes. Unlike the famous honey bee that hails from Europe and Asia, most bumble bee species are native to our area. Bumble bees have small underground colonies with a loose social system, compared to that of a honey bee. While bumble bees produce honey, it is in small quantities and certainly not enough to share on an industrial scale. Still, these fuzzy bumbles play an important role as pollinators of local wildflower populations and are even adapted to pollinate certain flowers!
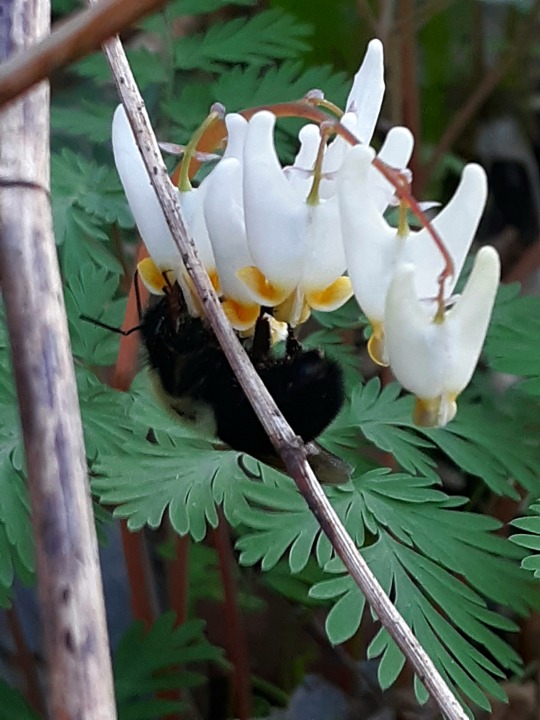
This fashionable bumble bee is trying to squeeze into a little pair of white breeches! Duchman’s breeches (Dicentra cucullaria) to be exact. A bumble bee’s proboscis (tongue) is long enough to reach the nectaries within the nectary spurs or “pant leg” and the bee is strong enough to push open the flower petals to collect pollen.
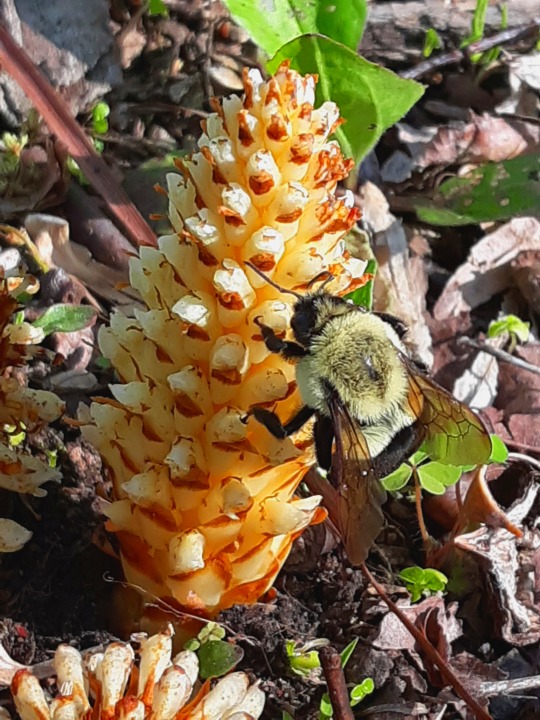
This bumble bee is sipping nectar from squawroot (Conopholis americana). Bumble bees and flies are the typical visitors of this parasitic plant! Fun fact: bumble bees “buzz” pollenate, which means they vibrate their bodies, effectively knocking pollen down into the flowers they visit.
Upon observing the flight of a bumble bee, I have noticed that while they are strong flyers, they are not the most graceful. Sometimes they miss their mark and land on a chunk of moss instead of the flower. However, they just take that moment to rest their wings before firing up their little motor and buzzing off into, hopefully, the next flower. Their rather clunky flight pattern gave me an idea for a fun activity to help young children learn about pollinators (and sneak in a STEM activity): The Bumble “Weee” Catapult! See below for assembly instructions:
Materials
3 pipe cleaners
Paper
Pen or pencil
Coloring supplies
Scissors
Recycled egg carton
Recycled plastic spoon
4-5 large Rubber bands
Let’s dismiss the idea of launching real bumble bees and begin building the bee puppet 😉. Pick 3 different colors of pipe cleaner. Feel free to go with traditional bee colors or mix it up!
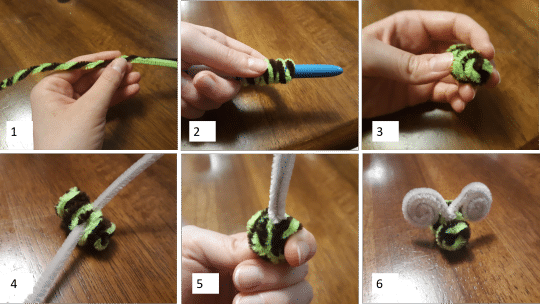
1. For the body, twist together two pipe cleaners.
2. Wrap the twisted pipe cleaners tightly around a pen or pencil and slide it off.
3. Tuck the loose ends inward and tighten up the coils on the end you would call the head.
4. For the wings, shorten the remaining pipe cleaner by 1/3, then loop it under one of the coils of the bee’s body.
5. Adjust the pipe cleaner for equal length on either side and twist at the base.
6. Roll in the loose ends to finish forming your wings, thus completing the bumble bee.
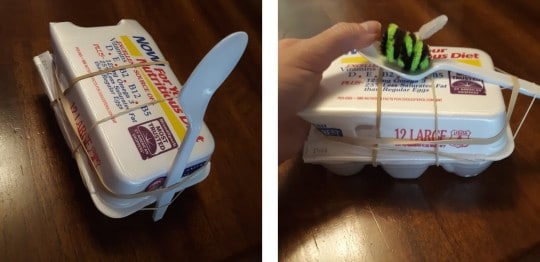
Next, build the catapult to help your bee puppet fly. The catapult consists of half of an egg carton, 4-5 rubber bands, and a recycled spoon. Tension energy is generated when the spoon is pulled back. The arm stores that energy as potential energy. Upon release, that potential energy is transferred to the object as kinetic energy, moving the object away from the arm. Pictured is the simplest catapult design with rubber bands holding the spoon, or arm of the catapult, in place. Feel free to design something more elaborate!
Finally, the bumble bee needs a flower to land in! Draw a flower of your choice on a piece of paper and color it in. Many bees are able to see UV light, which means they are able see colors and patterns invisible to the human naked eye. Some flowers have nectar guides that really stand out to bees, so feel free to draw some nectar guides, or lines that point to the center on your flower targets to help guide your bumble bee!
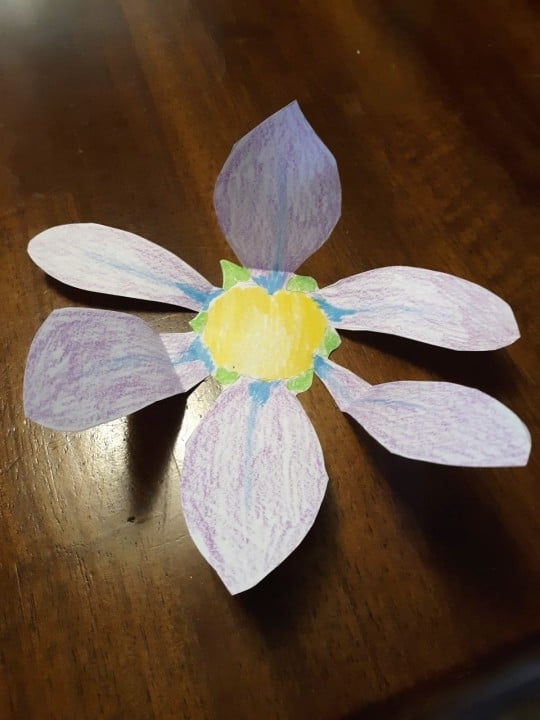
Feel free to create as many flowers as you like and propel your little bumble bee into as many flowers as you can. Happy pollinating!
Sara Klingensmith an educator at Powdermill Nature Reserve, Carnegie Museum of Natural History’s environmental research center. Museum employees are encouraged to blog about their unique experiences and knowledge gained from working at the museum.
Related Content
Jumping Spiders with Sebastian
Jurassic Days: Cookie Excavation
Materials Needed
Stuffed Animal Safari: Map Activity
Materials Needed:
- Paper
- Something to write with
- Something to color with
- Scissors (optional)
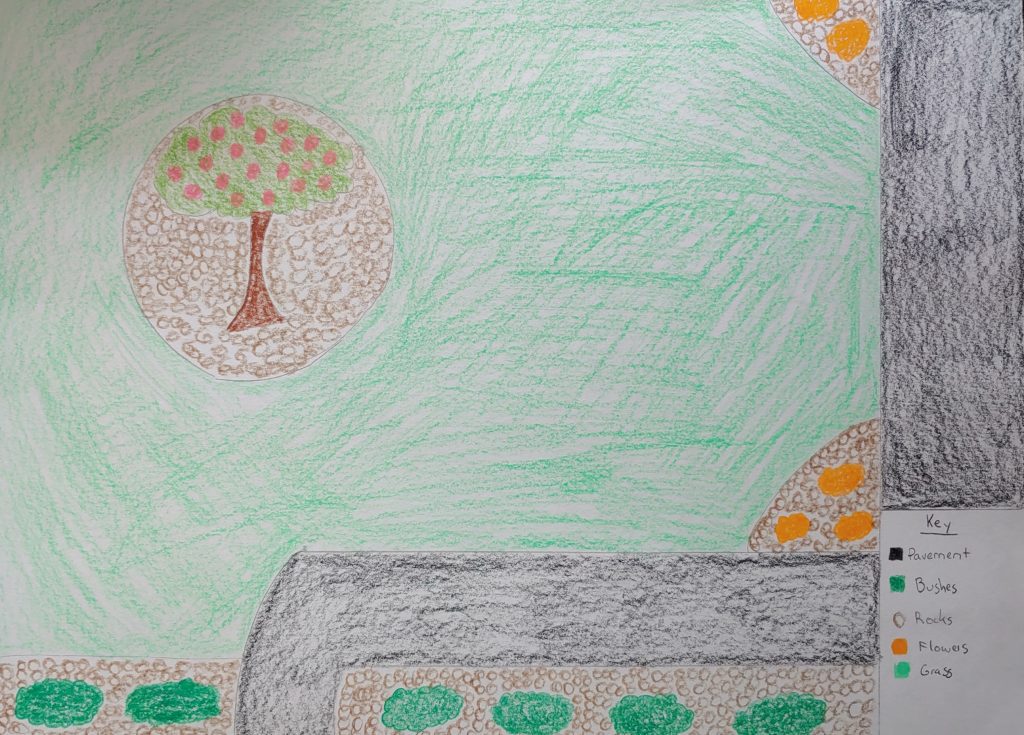
Use those materials to create a map of an outside space. It can be your yard, your neighborhood, even your city, or state! You can draw your map from memory or by exploring outside.
You can make your map interactive! If your environment changes you can update your map. Or if you want to track when and where animals are visiting, try drawing and cutting out a symbol that you can attach or remove!
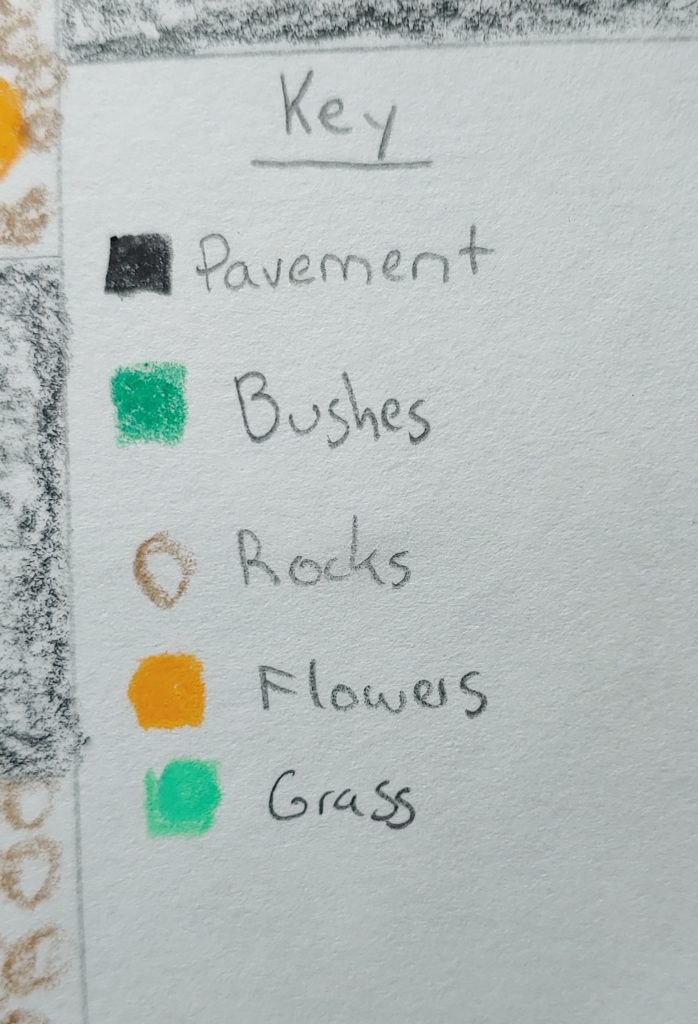
A map key will help you, and others, understand your map. A key is a little guide that explains what the different symbols or colors represent.
Why is mapping important?
Mapping increases your understanding of your own environment and improves your sense of place. Sense of place is the attachment you feel to your surroundings. By sitting down to map out what is around you, you are using your senses to experience the world and thinking about what you are experiencing.
Maps can often reveal what is most important to you. For example, my map features the cherry tree in my front yard because I love watching birds land on it and squirrels climb it. Even though it isn’t in bloom this late in the year, I drew cherry blossoms because I love seeing the pretty flowers. Your map may include your sandbox, swingset, or whatever is most important to you!
Participatory Mapping
For a different challenge, you can work together as a family or household to make one map that everyone creates together. Just like a map you create by yourself, a map made by a group can show what is important to everyone. Participatory maps are even used by cities and towns to discover what their citizens find most important about their environment!
What do maps mean for safaris?
Safari guides will use maps to navigate as they take people to explore. Those maps may show where animals are typically found, what areas are dangerous and should be avoided, and other important landmarks. Those maps will exist because someone explored or remembered their environment and created them, just like your map!
Stuffed Animal Safari: Binocular Activity
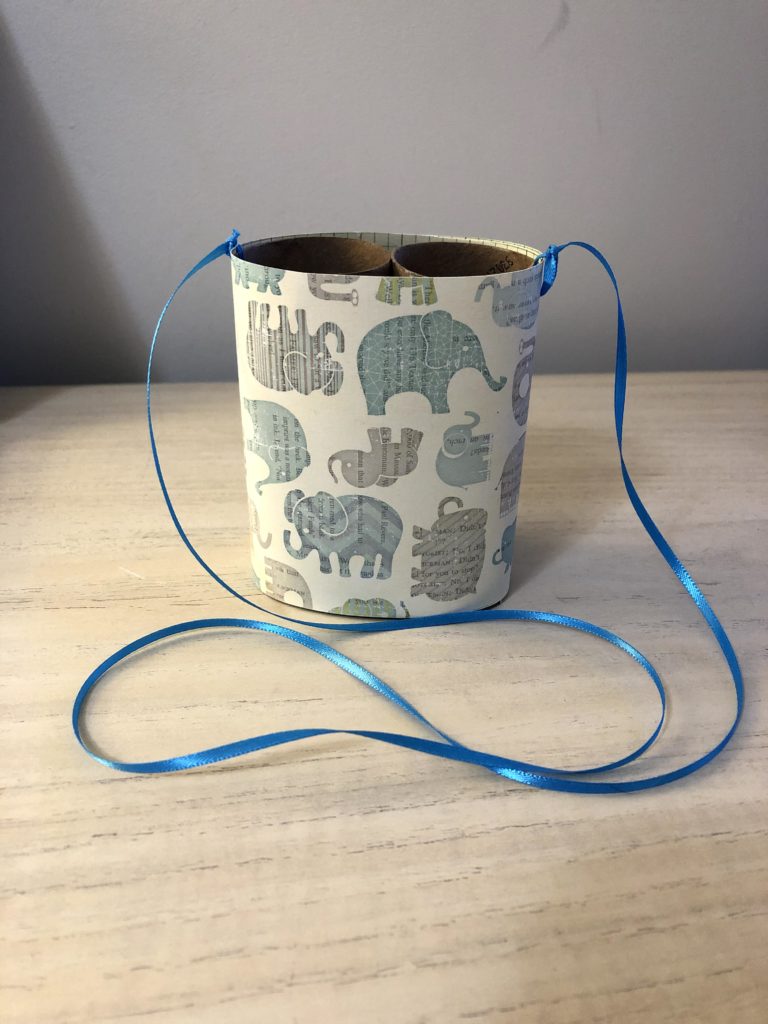
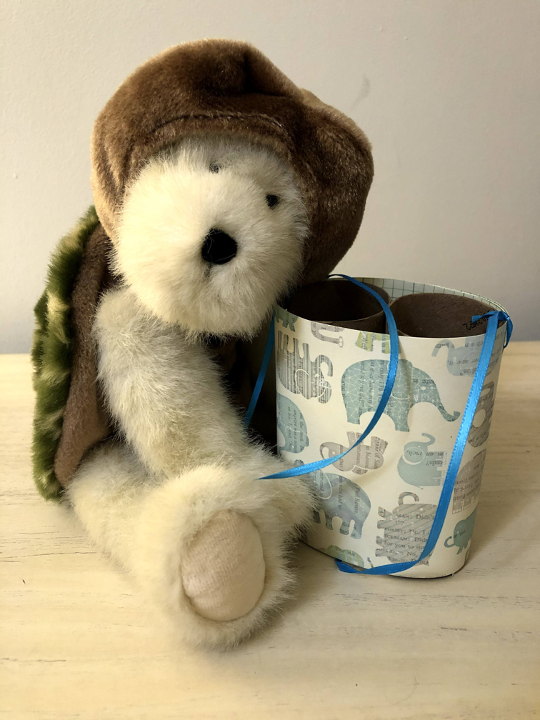
What safari is complete without binoculars? Use this step-by-step guide to build your own set of binoculars to see all of the animals on our safari up close!
Materials Needed:
- Sheet of paper at least 11 inches long (can be plan or patterned)
- 3 feet of ribbon (or less depending on desired length)
- 2 empty toilet paper tubes (or 1 empty paper towel tube, cut in half)
- Scissors
- Pencil
- Hole punch
- Glue stick
- Tape
- Crayons (for coloring paper)
Directions
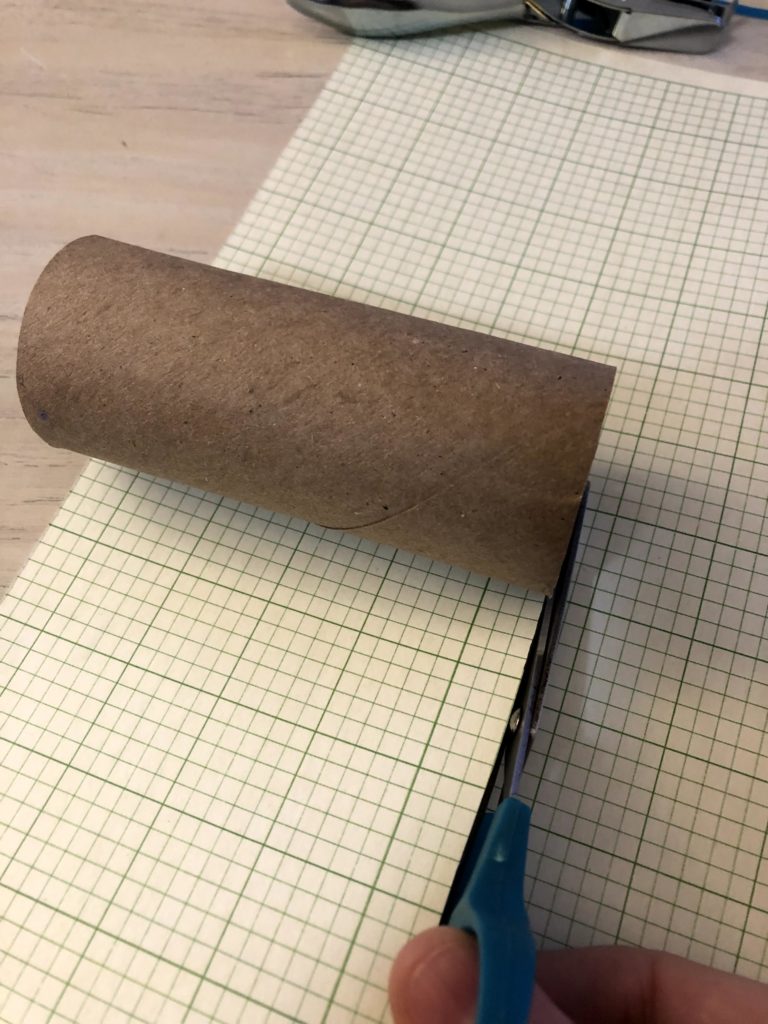
- Lay 1 toilet paper tube against the back of the paper and mark the length of the tube with a pencil
- Cut at your mark to create a long piece of paper that is as wide as the tubes
- Decorate the outside of the paper, if desired
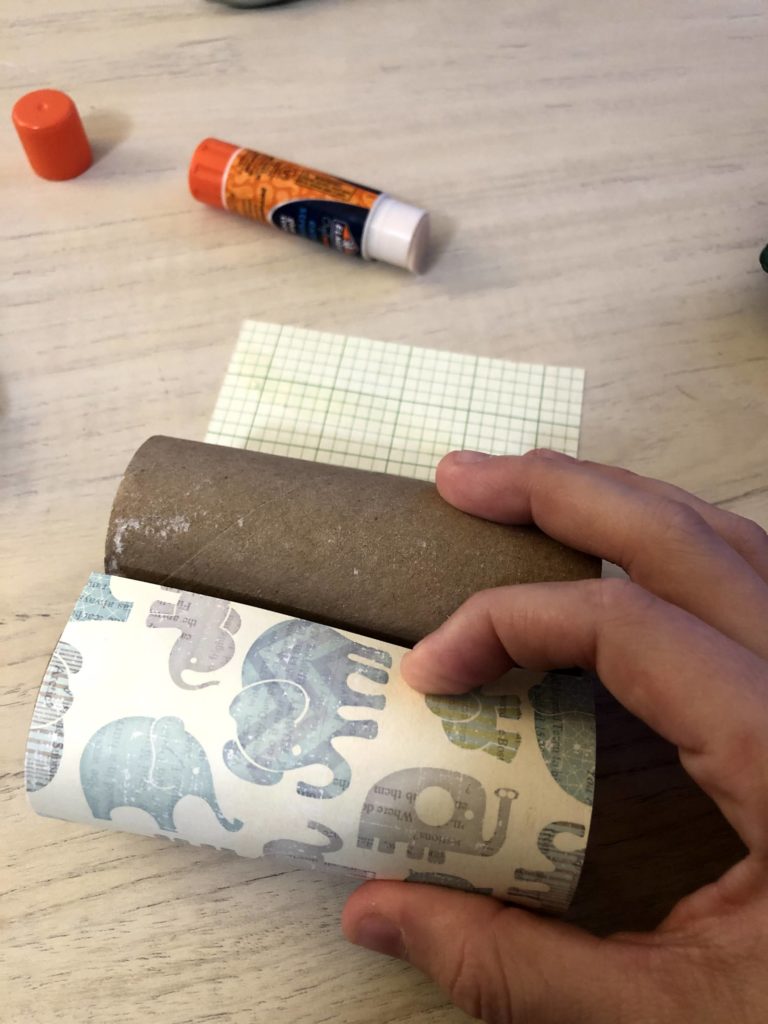
- Turn paper pretty side down
- Use the glue stick to place glue all over the back of the paper
- Use the glue stick to place glue all over the tubes
- Line up tubes with the edges of the paper and roll to cover the tubes
- Secure the seam with a piece of tape to hold everything in place as the glue dries
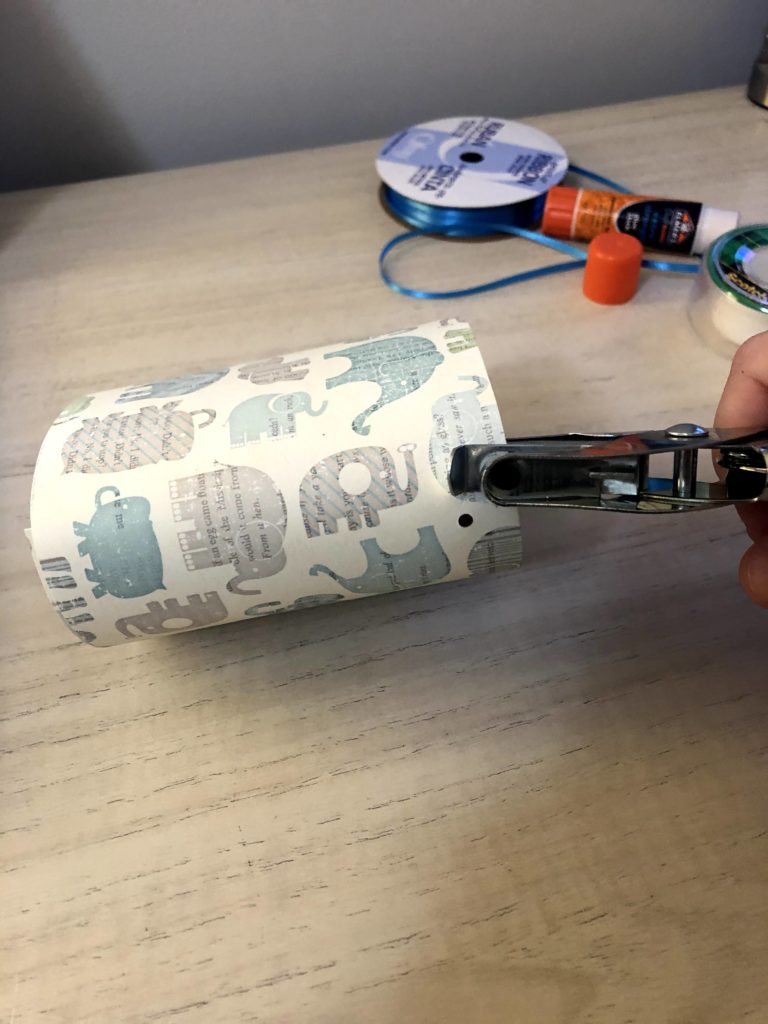
- Place a hole punch on one side for the string to go through
- Place a hole punch in the same place on the opposite tube for the other string attachment
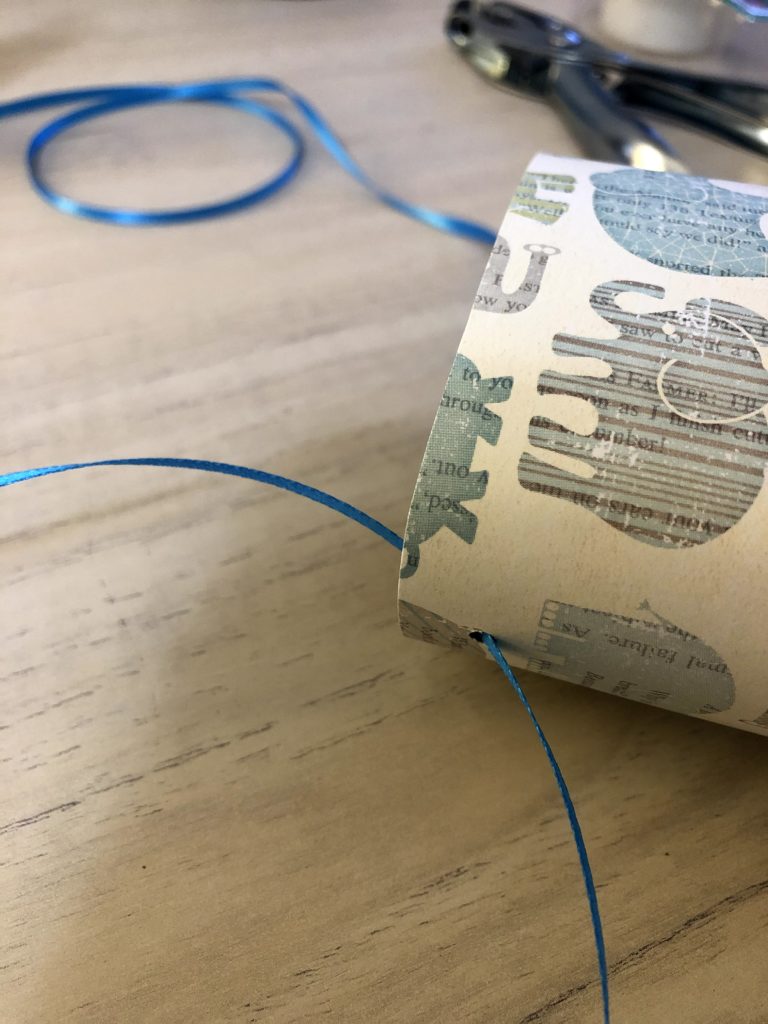
- Measure the length of string to your desired length
- Tie each end through the holes that are punched in the sides
