• Skip to primary navigation
  • Skip to main content
  • Skip to primary sidebar

Carnegie Museum of Natural History

One of the Four Carnegie Museums of Pittsburgh

  • Visit
    • Buy Tickets
    • Visitor Information
    • Exhibitions
    • Events
    • Dining at the Museum
    • Celebrate at the Museum
    • Powdermill Nature Reserve
    • Event Venue Rental
    • Gift Cards
  • Learn
    • Field Trips
    • Educator Information
    • Programs at the Museum
    • Bring the Museum to You
    • Guided Programs FAQ
    • Programs Online
    • Climate and Rural Systems Partnership
  • Research
    • Scientific Sections
    • Science Stories
    • Science Videos
    • Senior Science & Research Staff
    • Museum Library
    • Science Seminars
    • Scientific Publications
    • Specimen and Artifact Identification
  • About
    • Mission & Commitments
    • Directors Team
    • Museum History
  • Tickets
  • Give
  • Shop

Kathleen

July 6, 2020 by Kathleen

Jurassic Days: An Adventure Under the Sea

Let’s take a swim through the Western Interior Seaway! This area, also called the Cretaceous Seaway, was a shallow sea filled with abundant marine life. This sea was about 100 feet deep, like the Mediterranean, which enabled many forms of marine life to thrive. The Western interior Seaway existed during the mid-to late Cretaceous period (145-65 Mya). This body of water split the continent of North America into two land masses. These areas stretched from the Gulf of Mexico through the middle of North America. Several wonderful specimens of marine life have been found in Kansas, which was under water during the Cretaceous period.

Ready to go for a swim?  As an interpreter, when I am educating visitors, as we approach the exhibit, we mimic swimming with our arms in the air and walk toward the display! That is always fun and gets our imagination ready! Here we go….

As we approach this Gallery, we see a diorama (a full size 3-D model of museum collection pieces) with an azure blue background. It really gives the impression that we are underwater! Luminescent lighting gently fluctuates creating a beautiful reflection, much like flowing water on the ground. In the background, softly echoing music plays and creates a floating sensation. as the light reflects.

Slowly, a large marine reptile comes into view. This is a creature called Dolichorhynchops bonneri (Dol-lee-kor-in-chops), meaning “long-nosed face.”
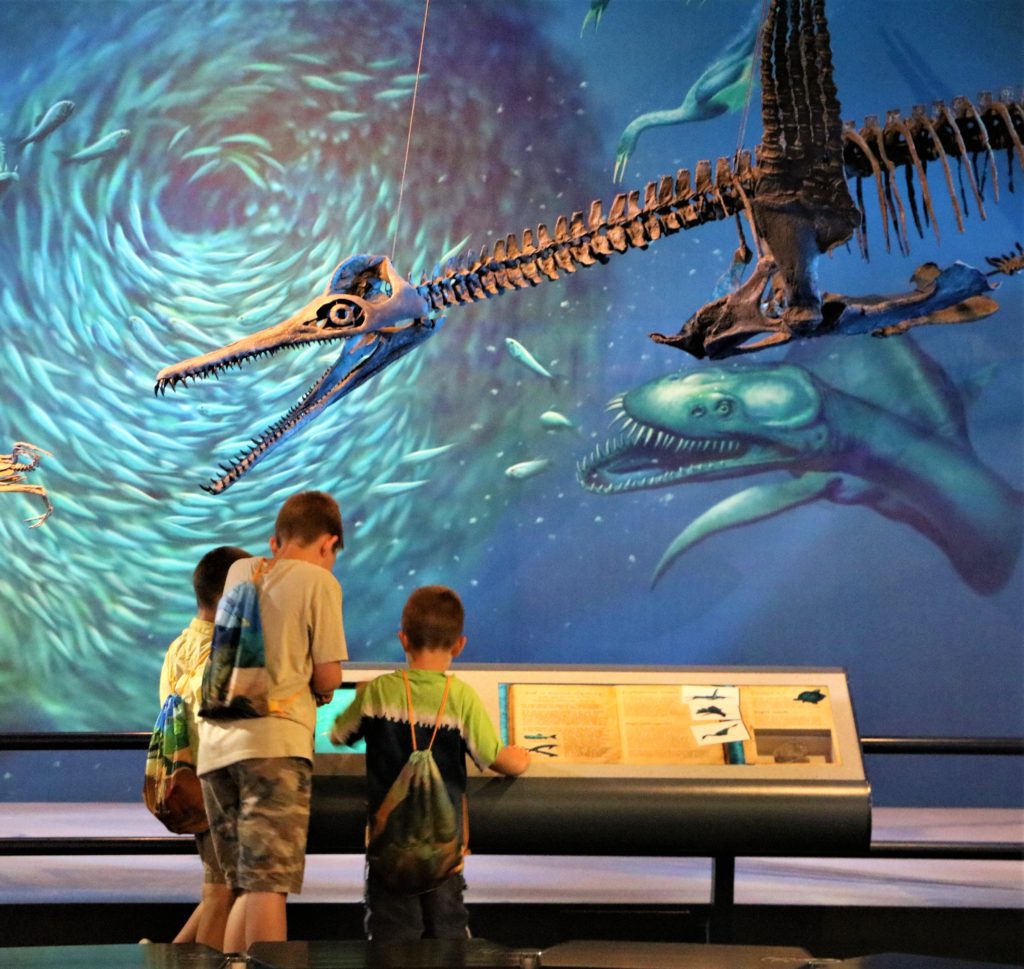
Dolichorhynchops bonneri
“Dolly”

Let’s call it “Dolly” for short! Dolly is a Plesiosaur – primarily identified by its distinct characteristics: a short tail, long flippers and a flattened body structure which enables it to be a faster swimmer to catch its prey. The creature’s jaws are not thought to have a powerful bite force. The teeth are long and thin, not meant for tearing, but more for the ability to puncture soft, slippery prey. These creatures most likely swallowed their prey whole. In this diorama, Dolly appears to be pursuing a flightless bird with teeth called Hesperornis regalis (“western bird”) which had stout legs for swimming and tiny wings used for marine steering rather than flight. Dolly and Hesperornis regalis fossils were found in the late Cretaceous marine limestone of Kansas.

Our specimen of Dolichorhynchops bonneri is a cast. The fossil remains were recovered by George F. and Charles A. Sternberg from the Smoky Hill Chalk and Fort Hays Limestone-Kansas. The original is a type specimen on display at the Museum of Kansas. A type specimen, or “holotype” is a single specimen known to have been used to formally describe a species.

I hope you enjoyed our undersea adventure and I invite you to explore the numerous exciting areas of our museum. It’s a great place to learn about the past, present and future

Written by: Shari Bechtel is a Gallery Experience Presenter and Natural History Interpreter.
Filed Under: Blog Tagged With: Jurassic Days

July 6, 2020 by Kathleen

Jurassic Days: Make Fossil Impressions!

Fossils are the preserved remains, or traces of remains, of ancient organisms. There are many types of fossils and many different ways that fossils form. Most fossils are not the actual body parts of the original organisms. Rather they are altered remains, impressions, molds, and casts of parts of the organisms.

Fossil impressions are prints, or indented marks, of plants or animals from long ago. The plant or animal lands in mud, silt, or sand and leaves an imprint in the soft earth. Over time, the plant or animal disappears, but the impression remains. When the imprint hardens, it forms a mold. Later, mud or other materials can fill the mold to make a cast—a copy of the original. Some examples of impressions are trace fossils such as footprints, trails, burrows, or other traces of an animal rather than of the animal itself.

In the following activity, you will create your own impression molds to see how fossil impressions are formed and discover what they can tell us about the organisms that leave them behind.

Materials for Outdoor Version

  • Soil – From your garden or yard
  • Water
  • Container with edges – Just to keep the soil mixture all in one place
  • Mixing spatula
  • Sturdy plastic toy – Use a dinosaur if you have one!

Materials for Indoor Version

  • 1 cup of water
  • 1 cup of salt
  • 1 cup of flour
  • Large mixing bowl
  • Mixing spatula
  • Wax paper
  • Sturdy plastic toy – Use a dinosaur if you have one!

Directions for Outdoor Version

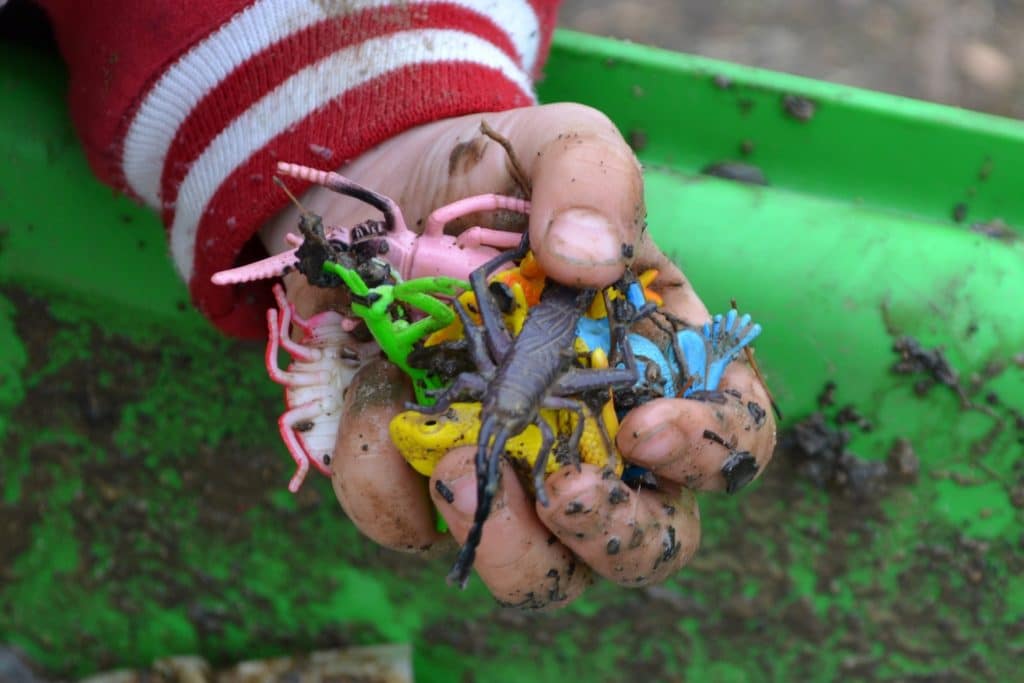
kid holding toys over dirt bin
  1. Line the bottom of your edged container with about a ½” layer of soil.
  2. Mix in water until moist, but not muddy. If you overwater, simply add more soil until you get a thicker consistency.
  3. Walk your plastic toy through the soil mixture, making footprints as you go.
  4. Gather leaves, plants, and flowers from the backyard and see how each one creates a different impression.
  5. Smooth out the mixture to try more variations!

Directions for Indoor Version

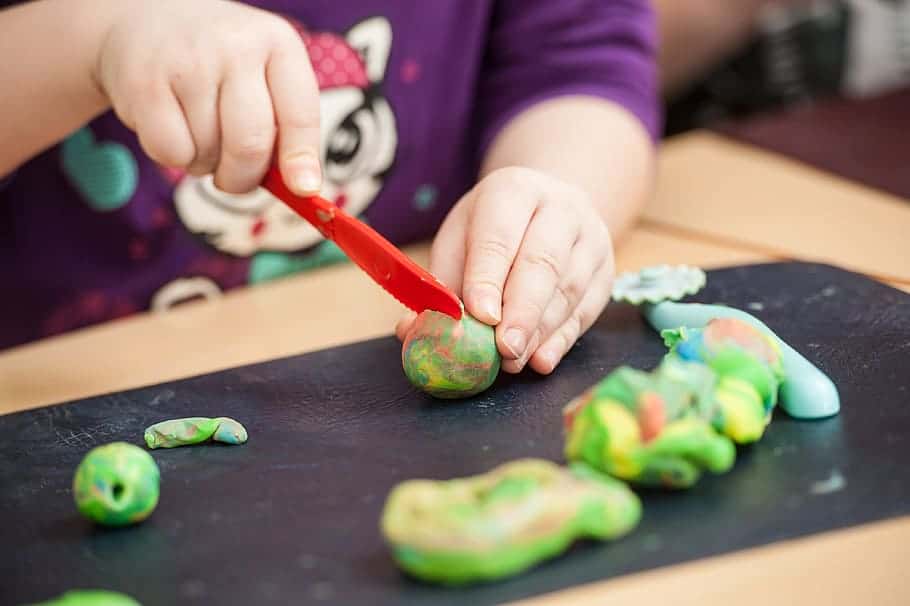
child playing with clay

1. Make a salt dough – Add about half of your salt to your flour and mix. Then, slowly add water and start mixing the ingredients. Add more water and salt until you get your desired consistency. The dough should be firm and not too sticky.

2. Take some of the dough and roll it into a ball, then squish the ball into a disc or pancake shape on a piece of wax paper.

3. Place your dinosaur’s feet in flour so they won’t stick, then walk the dinosaur through the dough disc, making footprints as it goes.

4. If you want to preserve your fossils, let your dough dry for a few days or bake it in the oven at 350 degrees for about 20 minutes on a baking sheet or parchment paper (do not bake the wax paper!).

Filed Under: Blog Tagged With: Jurassic Days

June 20, 2020 by Kathleen

History of Teddy Bears

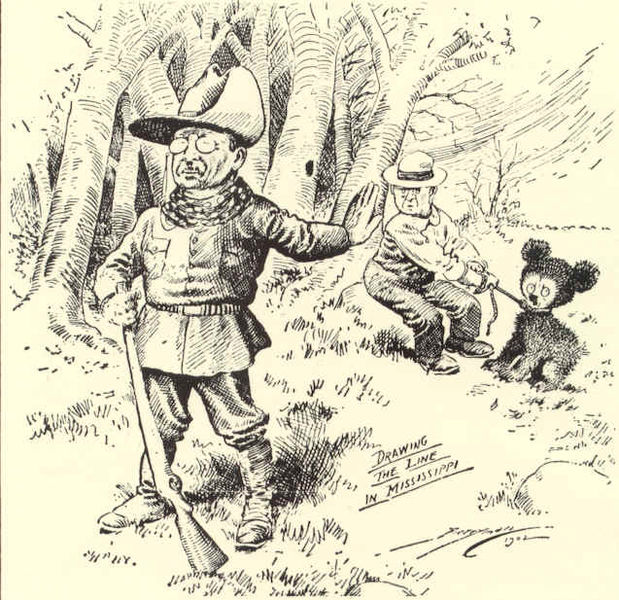
political cartoon of teddy and bear

We’ve all played with one at some point; stuffed animal bears are rooted in our country’s childhood. But did you know that we have these stuffed bears because a certain man immersed himself in the natural world in the early twentieth-century? 

Theodore Roosevelt, commonly known as Teddy, became the 26th President of the United States in 1901. Being an avid outdoorsman and naturalist, Roosevelt loved to explore the natural world. In his presidency he was even able to protect over 200 million acres of public land, and establish the U.S. Forest Service, as well as five National Parks! But what does this have to do with the stuffed animal bears?  

In the fall of 1902, Teddy Roosevelt accepted a hunting invitation from Mississippi governor, Andrew Longino. Their guide was a man named Holt Collier, who knew the land well. Collier was determined to help an eager Roosevelt find a black bear. On the second day of their excursion, Collier came across one. Collier, who knew Roosevelt was significantly behind him with Longino, decided to tie the bear up for Roosevelt. However, when Roosevelt arrived on the scene, he was astonished. Roosevelt exclaimed that such an act would be unsportsmanlike.  

The news of this act of compassion from the President spread so quickly around the United States that Clifford Berryman of the Washington Post produced the sensational cartoon at the top of this blog.

Then, a couple in Brooklyn, N.Y., Rose and Morris Michtom, saw the cartoon. They owned a penny candy shop and decided, for fun, that they would make a stuffed plush bear and display it in the window to honor the President. Rose cut out some pieces of fabric and sewed on some button eyes and put it in the window with the name, Teddy’s Bear. It was an overnight hit. So much so, that the Mitchtoms had to ask if they could use Roosevelt’s name for the bear. Roosevelt obliged, and their business took off! Instead of selling candy the couple decided to start the Ideal Toy Company, which went on to produce a multi-generational love of Teddy Bears.  

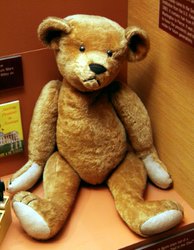
teddy

Roosevelt’s children were some of the first to play with the Teddy Bear. Although not confirmed, It is said that as a gift the Michtom’s gave the above bear to Kermit Roosevelt, who was thirteen at the time. The bear was a constant reminder to the children of the tenderness of their father and his deep connection to the natural world.  

Filed Under: Visitor Info Tagged With: Stuffed Animal Safari

June 20, 2020 by Kathleen

Stuffed Animal Safari: Build Your Own Safari Tent

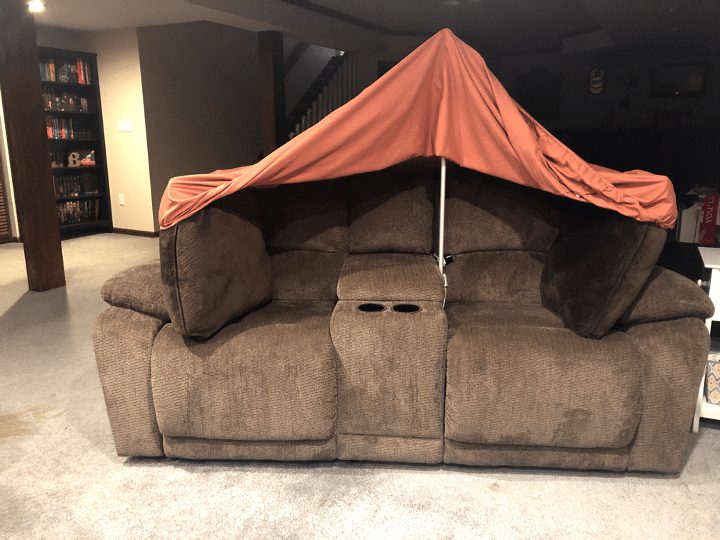
couch with blanked on it
blanket supported by pole in center of couch
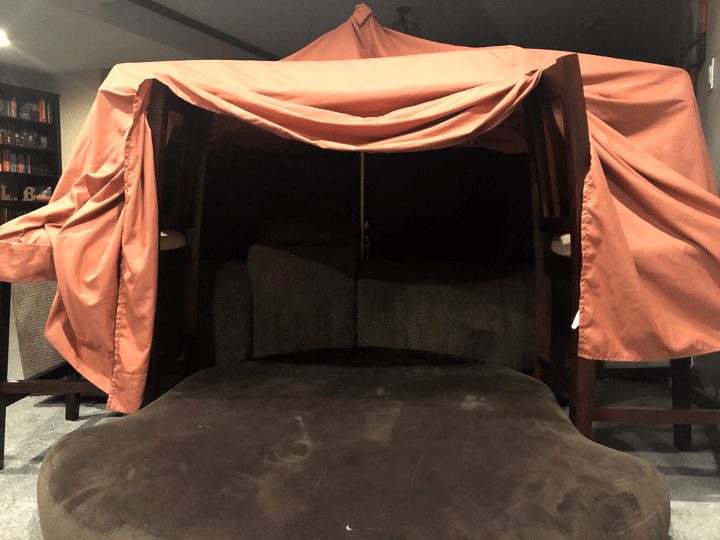
ties added to drape blanket on couch
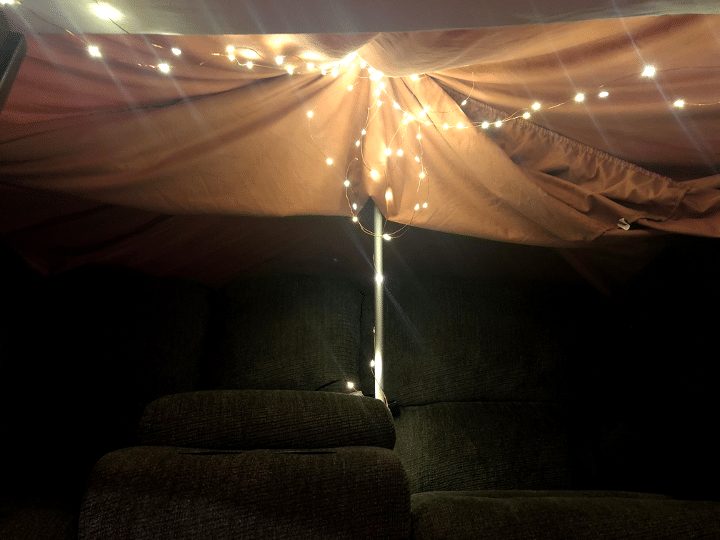
string lights in blanket fort on couch
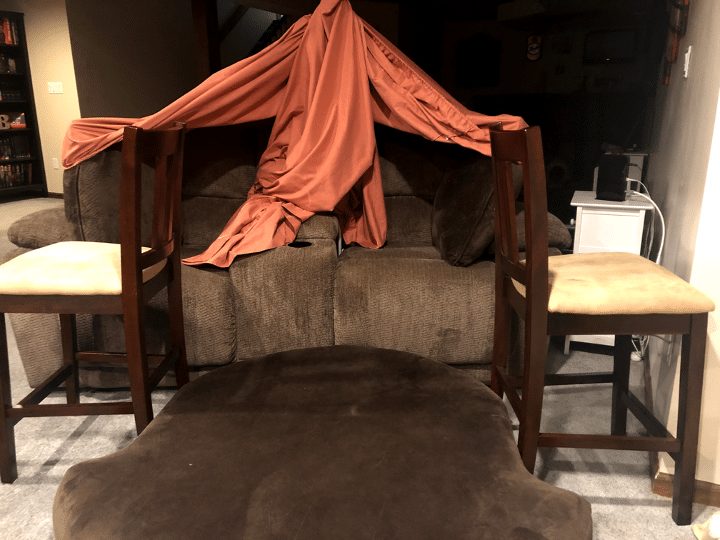
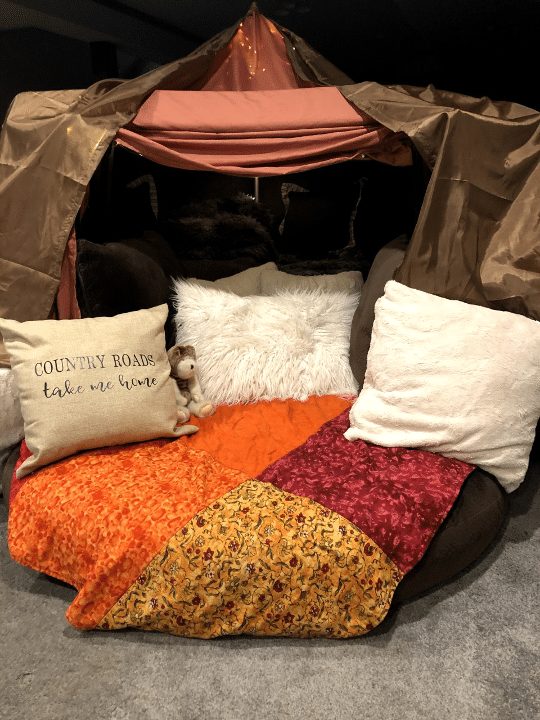
finished safari tent

Sometimes animal research expeditions or safaris that scientists participate in can last a long time. Camps are often set up in the savannah so researchers can be as close to wildlife as possible without disturbing animals’ natural behaviors. Here’s how you can build your own safari fort for you and your favorite stuffed buddy!

Materials Needed:

  • Blankets
  • Pillows or soft cushions
  • A couch or an area that has space to fit inside
  • Chairs or a small table for structure and support
  • Something to secure blankets (string works)
  • Lights

Directions

  1. Gather your supplies in the area you’d like to build your safari tent. If using a couch and chairs, try to set up your structure with your couch in the center, and the chairs in front of the couch on either side, facing outward. (Check our photo for reference!)
  2. If you’re using a pole to support the top of your tent, try to stick the pole down between the center of the cushions as safely (to you–and your couch!) as your can, like in our photo.
  3. Place your blankets on top of the furniture you’re using to make your safari tent. This will be the “roof” and should sit lightly on top. Make sure your blanket is long enough to cover the entire tent structure and leave an opening at the front for easy entry.
  4. Your safari tent can be as big or as small as you’d like. If you have multiple blankets, you can also try to make a door flap at the entrance to your safari tent. Researchers sometimes have these door flaps to hide themselves from animals so they don’t scare or interfere with them. Make sure your blankets are supported on top of your safari tent—if they’re loose or in danger of falling, try to make the safari tent smaller or use something like clothespins or books to weigh them down and secure them. If you’re having trouble, ask a grownup for help! *Do not enter your safari tent until you know for sure it won’t fall down*
  5. If you have lights, ask a grownup to help you set them up. Any type of light works well in a safari tent, and is important for nighttime study. If you don’t have string lights like the ones pictured, you can also use flashlights.
  6. Finally, decorate the inside of your safari tent by bringing in cushions, pillows, or extra blankets. Be sure to bring all of your stuffed animal friends and some snacks inside while checking out the rest of the Stuffed Animal Safari activities!

Filed Under: Blog Tagged With: Stuffed Animal Safari, Super Science Days

June 19, 2020 by Kathleen

Stuffed Animal Safari – Library Storytime

We’re joining Erin, a children’s librarian at Carnegie Library of Pittsburgh, who’s reading One Day in the Eucalyptus, Eucalyptus Tree by Daniel Bernstrom, Wild About Us by Karen Beaumont, and Old Mikamka Had a Farm by Rachel Isadora

Filed Under: Visitor Info Tagged With: Stuffed Animal Safari, Super Science Days

June 19, 2020 by Kathleen

Stuffed Animal Safari: Giraffe

Can you answer these giraffe questions?

Grab your best stuffed animal friend and a notebook to use for this week’s activities–your safari field journal–and let’s get started! If you need help answering some questions, an adult can help you look for answers online.

  1. Where do giraffes mainly live?
  2. What does this habitat look like? Draw it in your safari field journal!
  3. Could your stuffed animal friend live in this kind of habitat? Why or why not?
  4. What is one special adaptation giraffes have to help them survive in their habitat?
  5. What do giraffes eat? Are they carnivores, herbivores, or omnivores?
  6. Are giraffes endangered, vulnerable, or something else? What does this mean for future populations?

Learn More About Giraffes, Including Giraffes in the Museum Collection!

As the tallest terrestrial animal on Earth, giraffes (Giraffa) can get to fruits and leaves that other animals can’t reach.  But giraffes’ long limbs aren’t their only extraordinary features!

Giraffes are at home in the forests and savannahs of Africa.  These habitats are also where giraffes can find plenty of food high up in trees.  While tree leaves are the main part of their diet, they might also eat fruit, grass, and smaller shrubs.  Between 14 to 20 feet tall, adult giraffes can eat up to 75 pounds of leaves a day!  In order to easily pull all of those leaves out of trees, giraffes have an 18-inch-long purple tongue covered in thick hairs to protect against thorny twigs.

Baby giraffes start their life at six feet tall—which is as tall as an adult giraffe’s neck.  Within hours, the newborn giraffe can almost keep up with a running herd at 35 miles per hour.  Giraffes need to run fast from predators like lions and hyenas, but they can also defend themselves with a deadly kick powered by their long legs.

Not all giraffes are the same; there are at least eight different types or subspecies of giraffe found in Africa.  The pattern of blocky spots is one way to tell them apart—some giraffes’ spots have jagged edges and others are light or dark in color.

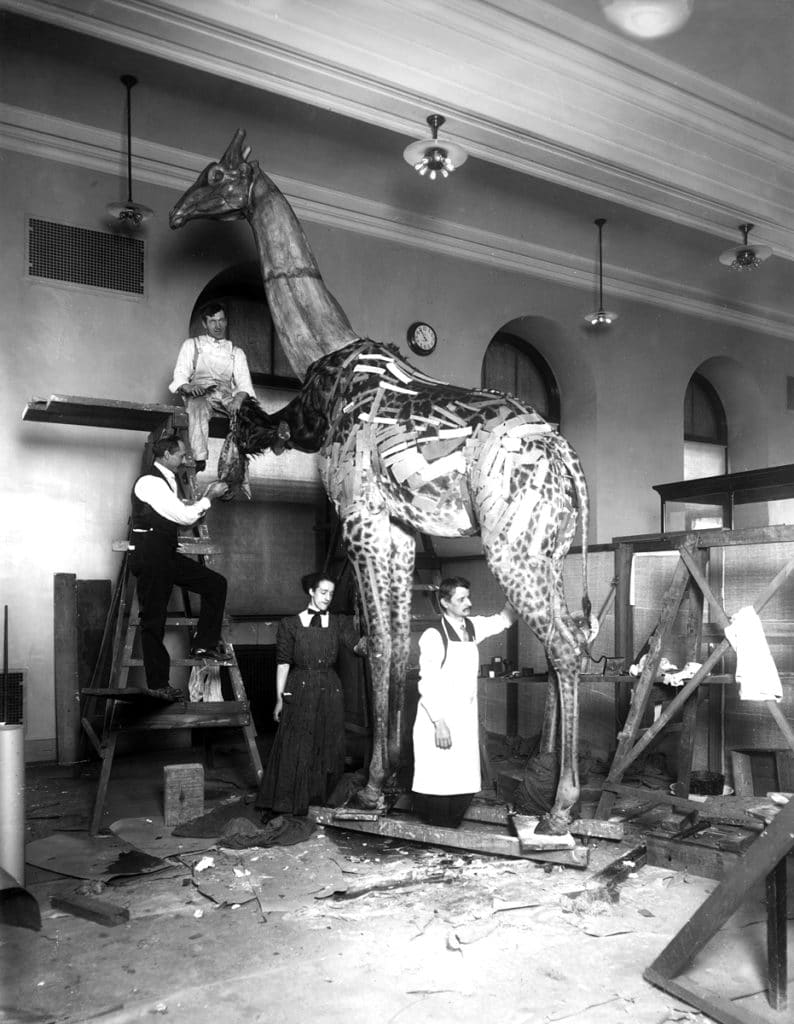
There are two different giraffes on display at the museum.  In the water hole exhibit is a Reticulated giraffe with large blocky spots that almost touch.  The other giraffe on display is a Masai giraffe with jagged spots. The Masai giraffe was collected by Pittsburgh-born Childs Frick on an expedition to Africa in 1912.  The completed giraffe display was the first of its kind in North America.

Giraffe taxidermy being constructed in early 1900s
Masai giraffe from Child’s Frick expedition being constructed as a taxidermy display for the museum.

Giraffes are listed as “Vulnerable” for conservation concerns and some types of giraffe are endangered.  This means that giraffes face serious risks in their native habitat and the number of wild giraffes is decreasing.  Major threats to giraffes include agricultural competition and illegal hunting.  Farmers and ranchers often exclude wild animals like giraffes from their land in order to prevent damage to crops or livestock.  Poaching, or illegal hunting, also directly impacts giraffe populations and can harm conservation efforts. The Giraffe Conservation Foundation is a great resource to learn more about and help wild giraffe populations!


Filed Under: Blog Tagged With: Stuffed Animal Safari, Super Science Days

  • « Go to Previous Page
  • Page 1
  • Interim pages omitted …
  • Page 6
  • Page 7
  • Page 8
  • Page 9
  • Page 10
  • Interim pages omitted …
  • Page 13
  • Go to Next Page »

sidebar

About

  • Mission & Commitments
  • Directors Team
  • Museum History

Get Involved

  • Volunteer
  • Membership
  • Carnegie Discoverers
  • Donate
  • Employment
  • Events

Bring a Group

  • Groups of 10 or More
  • Birthday Parties at the Museum
  • Field Trips

Powdermill

  • Powdermill Nature Reserve
  • Powdermill Field Trips
  • Powdermill Staff
  • Research at Powdermill

More Information

  • Image Permission Requests
  • Science Stories
  • Accessibility
  • Shopping Cart
  • Contact
  • Visitor Policies
Stay in the loop! Sign up for our newsletter(s).
One of the Four Carnegie Museums | © Carnegie Institute | Privacy Policy | Terms of Use | Accessibility
Rad works here logo