• Skip to primary navigation
  • Skip to main content
  • Skip to primary sidebar

Carnegie Museum of Natural History

One of the Four Carnegie Museums of Pittsburgh

  • Visit
    • Buy Tickets
    • Visitor Information
    • Exhibitions
    • Events
    • Dining at the Museum
    • Celebrate at the Museum
    • Powdermill Nature Reserve
    • Event Venue Rental
    • Gift Cards
  • Learn
    • Field Trips
    • Educator Information
    • Programs at the Museum
    • Bring the Museum to You
    • Guided Programs FAQ
    • Programs Online
    • Climate and Rural Systems Partnership
  • Research
    • Scientific Sections
    • Science Stories
    • Science Videos
    • Senior Science & Research Staff
    • Museum Library
    • Science Seminars
    • Scientific Publications
    • Specimen and Artifact Identification
  • About
    • Mission & Commitments
    • Directors Team
    • Museum History
  • Tickets
  • Give
  • Shop

activities

April 29, 2020 by wpengine

City Nature Challenge Activity: Make Your Own Birdfeeder

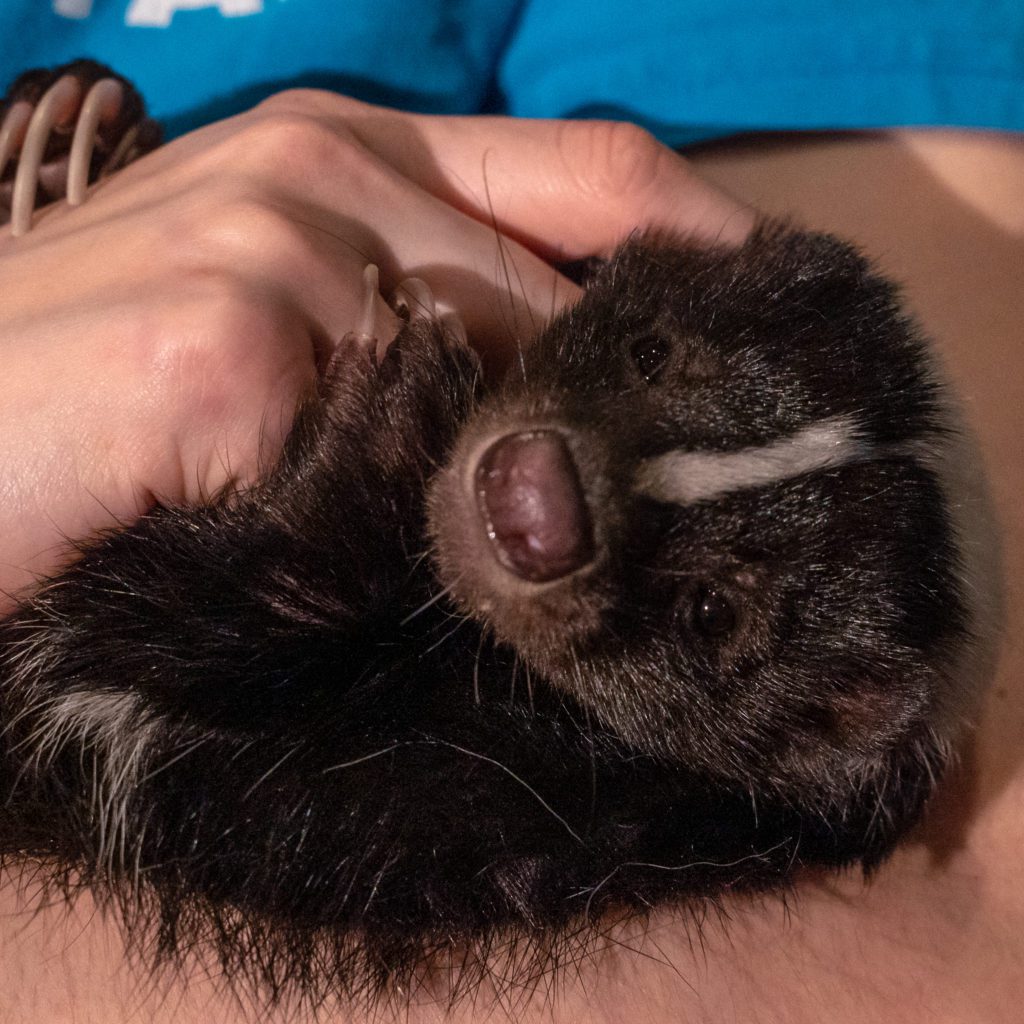
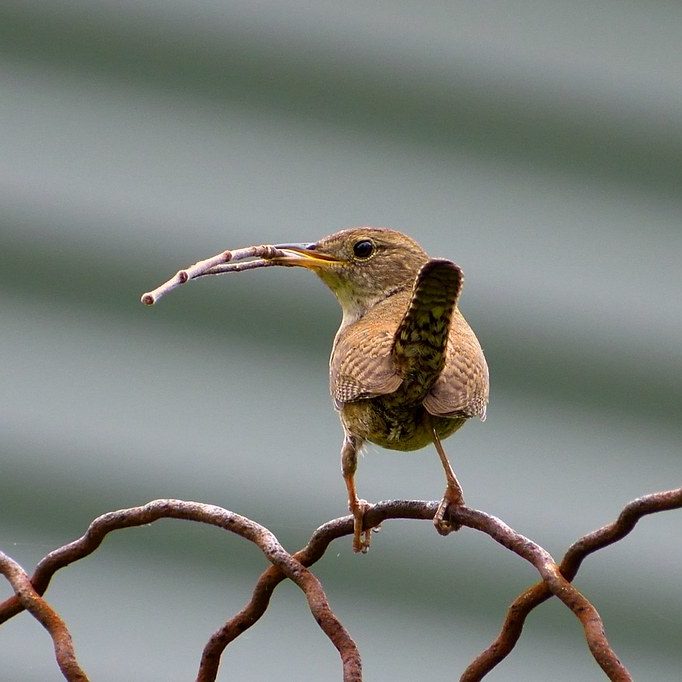
During the City Nature Challenge (April 29-2, 2022) you can share your nature discoveries with people around the world! And one great way to find nature is to bring it right to you. A simple bird feeder made with items you can find inside or around your house can turn your front or back porch into a bird sanctuary. If you are lucky, you might observe some other visitors from nature. By using the iNaturalist app you can share photos with others and be a part of the City Nature Challenge.

Here’s what you need:

·       Pinecones (collect as many as you want to make!)

·       Birdseed in a plastic or glass container

·       Peanut butter (use an alternative if you have a nut allergy)

·       A spreading utensil

·       String

·       Cardboard, wax paper or foil

Here’s what to do:

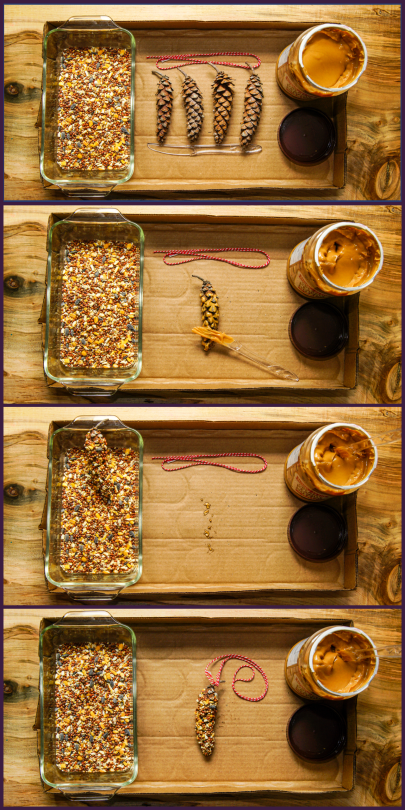
·       First, gather your materials and get your station ready. Lay down a piece of cardboard, wax paper or foil to contain any mess. Trust us, your parents will thank you.

·       Smear some peanut butter on your first pinecone with your spreading utensil. This layer will give the pinecone a sticky surface and one more layer of flavor for your feathered friends to enjoy.

·       Next, roll the pinecone in the container of bird seed until it has a nice, even coat.

·       Tie your string around the stem of the pinecone and make sure it is secure enough to hang. If your pinecone does not have a stem, that’s not a problem. Just tie it around the widest end.

Hang it from a secure location and wait for nature to come to you!

What happens next?

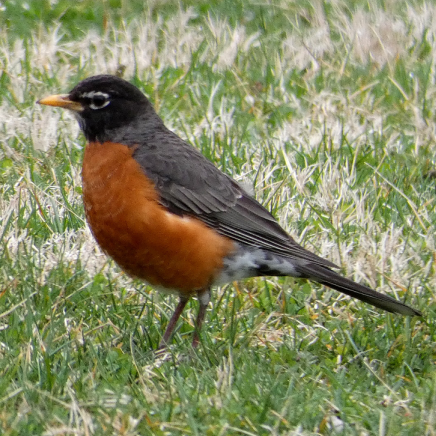
Now it’s time to get scientific! Use a journal to keep track of the different birds and animals that visit. Check at different times of the day, too – does anything change from morning to evening? If you take photos or record sound files, you can share them on the iNaturalist app (with a grownup’s permission!) and learn more about what you found. Bonus: any photos you take & share on iNaturalist between April 24-27 count for the City Nature Challenge. We would love to see your findings as well! Use the hashtag #CityNatureChallenge and tag @CarnegieMNH on Facebook, Instagram, Twitter, or TikTok.

Fun Fact

One of the earliest known bird feedings took place in India in roughly 1500 B.C. The practice of “bhuta yajna” involved feeding birds traditional rice cakes. This practice is still occurs today and the birds remain well fed!

Filed Under: Blog Tagged With: activities, City Nature Challenge, Museum from Home, Nature Lab

April 29, 2020 by wpengine

How-to Draw a Squirrel

If Pittsburgh had an animal mascot, I think it would be a squirrel.  So, let’s draw a squirrel together.

Early naturalists, explorers, and scientists didn’t have cameras to take photos of the animals and plants that they saw.  Instead they would draw them so that they could show fellow scientists and the public what kinds of new species they discovered.

One of the many squirrels that live in our area is the gray squirrel.  Gray squirrels usually have a grayish or brownish back and a white belly.  Some gray squirrels are melanistic—that means that they’re all black—and we call them black squirrels, but they’re actually a gray squirrel.

Before we get started you might need to gather some supplies.  Use a pencil and eraser, just in case you make some mistakes (it’s okay to make a mistake).  Get some paper and a comfy spot to draw—make sure you cover your table to avoid making marks on it.  Don’t forget the colors!  I like colored pencils, but you can use markers, crayons, paint, or anything else to color with.

Here’s a tip: try out some ideas on scrap paper so that you know what works best for you.  Practice makes perfect!

Step 1: Shapes

Use some basic shapes—circles, triangles, squares, and lines—to make up the general shape of what you want to draw.  Use light pencil strokes so that they’ll be easy to erase later.

Try to keep all of your shapes balanced to one another—you don’t want your squirrel to have a huge head!

I started by drawing a big circle, like a boundary zone, to keep all of the other shapes from getting too big.  It doesn’t have to be a perfect circle; we can erase it later.

I also like to have a photo that I’ve taken or found online to use as a reference for what I’m drawing.

If you want to take it to the next level, you can also check out some anatomical and skeletal models of squirrels or other animals online to understand more about their muscle and bone structure.

Step 2: Silhouette

Next let’s connect our shapes so that we can have a good outline of our subject.  You can add eyes and some of the rough edges.  Try to zone out where your colors will change too—for instance the squirrel’s white belly will be different than its greyish brown back, so I’ll add a line to mark that.

We can also erase that boundary zone circle we made earlier, unless you want to add a colored background for your squirrel.

Let’s also give our squirrel a nut to eat.

Step 3: Details

Add more details.  Add some furriness to the body, add in details on the ears and face—including some whiskers, and make that tail really fluffy.  You can also erase some of those shapes we made in step 1 and feel free to make a few changes to balance it all out if you want to.

It’s also important in this step to know how detailed you want to be.  Remember: a smaller sketch doesn’t need as much detail, but a bigger sketch can have more.  Whatever you think looks best.

Step 4: Color

This step is optional, sometimes a black and white sketch can tell a great story.  However, if you have some time, then adding color to your drawing can also really bring it to life.

You can use crayons, markers, paint, or any other color tool you want.  It’s always a good idea to test your colors on a separate piece of paper to see if they’re right for you or to try out a mix of colors.  Squirrels that live in North America are usually brown, black, red, or gray, but there are very colorful squirrels in the tropics. Have fun with it!

Be proud of your sketches!  No one else could have made it the same way that you did.  By drawing and coloring plants, animals, and other nature you can sharpen your observation skills and gain a better appreciation for the beauty and uniqueness of all life.

Aaron Young is a museum educator on Carnegie Museum of Natural History’s Outreach team. Museum staff, volunteers, and interns are encouraged to blog about their unique experiences and knowledge gained from working at the museum.

Filed Under: Blog Tagged With: activities, City Nature Challenge, Education, mammals, Museum from Home

April 29, 2020 by wpengine

Egg Carton Seed Starter

If you’re anything like me, then you love eating eggs.  Fried, scrambled, boiled, poached, even pickled!  So, let’s take all those leftover egg cartons and do something fun.

Another food I love is tomatoes.  Sometimes when I cut up tomatoes, I get a bunch of seeds left on the cutting board.  You can take those seeds or try some other vegetable or fruit seeds to start in an egg carton seed starter.  I like to use tomatoes because they’re easy to grow and don’t take up too much space in the garden.

A quick note about growing seeds from fruits and vegetables:  Most of the time seeds that come from fruits and vegetables that we eat aren’t as successful as the seeds that come from a packet.  For example, seeds from a big beefsteak tomato might turn out to make smaller tomatoes.

Before we get started, we’ll need some supplies.  Find some tomatoes (any variety) and cut them up for a BLT or a snack—we need some of those seeds.  Always ask an adult to help out with a knife.  We also need an egg carton and some soil.

Let’s fill that egg carton with soil and gently pack it down.  You can use any gardening or potting soil.  Make sure there’s at least one to two inches of soil.  Poke the tip of your finger in the soil in each egg cup to make a hole—the hole doesn’t need to be deep.  You can put two or three seeds in each hole (make sure the seeds don’t touch) and then cover them up loosely.  Once all of your holes are filled in, you can gently sprinkle water over them until they’re really wet.

Set your egg carton in a plastic dish or on a plate to keep water from dripping out and place your planted seeds inside where they’ll be warm.  Keep an eye on them to make sure the soil doesn’t dry out too much.  Only water when the soil feels dry on top and watch out for mold growth—you can scoop the mold out of the soil if you see it.

After a week you might see little tomato plants poking up from the soil.  Make sure they get lots of light in a south-facing window.  You should plant them up to a bigger pot or into the garden when they’re about two or three inches tall.  Just cut or tear the carton away.

This is a fun way to reuse waste and to grow your own food.  It’s also a ton of fun to watch plants grow from a little seed into a big bush filled with fruit.  And what a reward that will be!

A few tips on tomato plants:

·      You can pinch off a few of your tomato seedlings so that there’s one strong one in each cup—tomatoes need a strong root system and don’t do well with too much competition.

·      Plant tomatoes or place potted tomatoes where they get at least six hours of direct sunlight.

·      When you plant them up, use a big, deep pot, like a five-gallon bucket with holes for drainage.  Plant the stem into the soil so the root system can really jump out.

·      Fertilize or provide rich compost, tomatoes love good soil.  Water your plants if the soil feels dry or if the plants look droopy.

Aaron Young is a museum educator on Carnegie Museum of Natural History’s Outreach team. Museum staff, volunteers, and interns are encouraged to blog about their unique experiences and knowledge gained from working at the museum.

Filed Under: Blog Tagged With: activities, Education, Museum from Home

April 23, 2020 by Kathleen

Super Science Activity: Dino Hatch Eggs

What You’ll Need

  • One Quarter (1/4) cup baking soda
  • 10-15 drops food coloring (optional)
  • Two (2) Tablespoons cornstarch
  • Two (2) Tablespoons dry citric acid (optional)
  • One to Two (1-2) teaspoons water
  • Small dinosaur toy
  • Gloves (optional)
  • Whisk
  • Large Bowl
  • Plastic Easter egg (for mold)
  • One Quarter (1/4) cup vinegar (to help dissolve egg)

Sponsors

Super Science Saturdays are sponsored by PA Cyber and Tender Care Learning Centers, a proud partner of Carnegie Museums of Pittsburgh. PAcyber The Pennsylvania Cyber Charter School LogoTendercare Learning Center logo

Filed Under: Blog Tagged With: activities, Super Science Days

April 23, 2020 by Kathleen

Super Science Activity: Make a Bird’s Nest

Make A Birds Nest

What You’ll Need

  • Paper plate
  • Crayons
  • Markers
  • Brown paper bag
  • Scissors
  • White glue
  • Craft paper
  • Wrapping paper
  • Easter grass (or paper strips)
  • Cotton balls
  • Cotton swabs
bird nest craft plate with sky colored in
bird nest craft with paper bag glued on
bird nest craft with grass glued on to create "nest"
bird nest craft complete with grass "nest" and colored eggs added

Directions

  1. Use crayons or markers to color the sky on your paper plate (or whatever you’ve chosen as the base of your nest).
  2. Cut the paper bag in half, crinkle it, and glue it to the edge of the plate.
  3. Let the glue dry and cut off the extra paper.
  4. Use cotton balls and white glue to add clouds. You can also add a sun and rainbow or another decoration.
  5. Fill your nest. The example in the photos use Easter grass. You can use craft paper, markers, and colored cotton swabs with the ends cut off to add color and texture.
  6. Use white glue to attach everything
  7. Add whatever you’d like to your nest! Make some bird eggs, add some flowers, get creative!
flying bird
standing bird

Sponsors

Super Science Saturdays are sponsored by PA Cyber and Tender Care Learning Centers, a proud partner of Carnegie Museums of Pittsburgh. PAcyber The Pennsylvania Cyber Charter School LogoTendercare Learning Center logo

Filed Under: Blog Tagged With: activities, Super Science Days, Super Science Saturday

April 22, 2020 by Kathleen

Super Science Activity: Spring-o Bingo

Happy spring! Take a look outside your window or go for a walk with a grown-up. Check off anything you see and try to get bingo!​

robin

Draw one when you’re done!
bird nest in tree
striped skunk
Learn about our Striped skunks, Gouda and Pepper Jack, animal ambassadors at the museum!
bird with twig
Read a blog about evidence of birds using plastic in nest-building.
rain droplets on glass
redbud tree
American Goldfinch
sunny Pittsburgh skyline
spring peeper
Read a short blog about what frogs do in Autumn!
seedlings in an egg carton
Eastern Cottontail
Forsythia
drawing of a bird with rabbit ears sitting on a nest of easter eggs
Eastern Gray Squirrel
Read a short blog about what frogs do in Autumn!
ants on a leaf
bee pollinating flower
Read a blog about why some Honey bees might be attracted to your bird feeder.
Red tailed hawk
Callery Pear tree
Sycamore tree
Read a short blog about what frogs do in Autumn!
plants growing in between sidewalk crack
potted herb plants
worm
dandelion
sunflower

spiderweb

You can document evidence of nature like this as well as seeds, animals tracks, and more in iNaturalist for City Nature Challenge as well!
Song sparrow

Filed Under: Blog Tagged With: activities, Super Science Days

  • « Go to Previous Page
  • Page 1
  • Page 2
  • Page 3
  • Page 4
  • Page 5
  • Go to Next Page »

sidebar

About

  • Mission & Commitments
  • Directors Team
  • Museum History

Get Involved

  • Volunteer
  • Membership
  • Carnegie Discoverers
  • Donate
  • Employment
  • Events

Bring a Group

  • Groups of 10 or More
  • Birthday Parties at the Museum
  • Field Trips

Powdermill

  • Powdermill Nature Reserve
  • Powdermill Field Trips
  • Powdermill Staff
  • Research at Powdermill

More Information

  • Image Permission Requests
  • Science Stories
  • Accessibility
  • Shopping Cart
  • Contact
  • Visitor Policies
One of the Four Carnegie Museums | © Carnegie Institute | Privacy Policy | Terms of Use | Accessibility
Rad works here logo