• Skip to primary navigation
  • Skip to main content
  • Skip to primary sidebar

Carnegie Museum of Natural History

One of the Four Carnegie Museums of Pittsburgh

  • Visit
    • Buy Tickets
    • Visitor Information
    • Exhibitions
    • Events
    • Dining at the Museum
    • Celebrate at the Museum
    • Powdermill Nature Reserve
    • Event Venue Rental
    • Gift Cards
  • Learn
    • Field Trips
    • Educator Information
    • Programs at the Museum
    • Bring the Museum to You
    • Guided Programs FAQ
    • Programs Online
    • Climate and Rural Systems Partnership
  • Research
    • Scientific Sections
    • Science Stories
    • Science Videos
    • Senior Science & Research Staff
    • Museum Library
    • Science Seminars
    • Scientific Publications
    • Specimen and Artifact Identification
  • About
    • Mission & Commitments
    • Directors Team
    • Museum History
  • Tickets
  • Give
  • Shop

activities

June 16, 2020 by Kathleen

Stuffed Animal Safari: Binocular Activity

cutting paper to cover toilet paper tubes
rolling paper around toilet paper tubes and gluing it on
punching hole in toilet paper tubes for ribbon
putting ribbon through binocular holes
finished binoculars

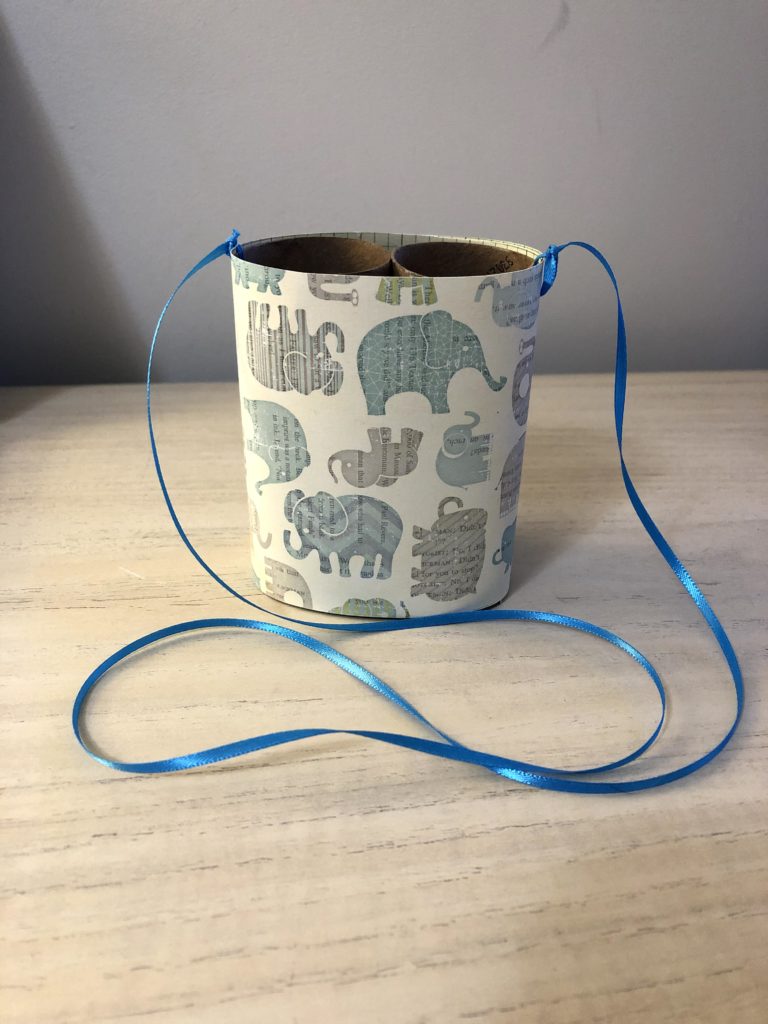
What safari is complete without binoculars? Use this step-by-step guide to build your own set of binoculars to see all of the animals on our safari up close!

Materials Needed:

  • Sheet of paper at least 11 inches long (can be plan or patterned)
  • 3 feet of ribbon (or less depending on desired length)
  • 2 empty toilet paper tubes (or 1 empty paper towel tube, cut in half)
  • Scissors
  • Pencil
  • Hole punch
  • Glue stick
  • Tape
  • Crayons (for coloring paper)

Directions

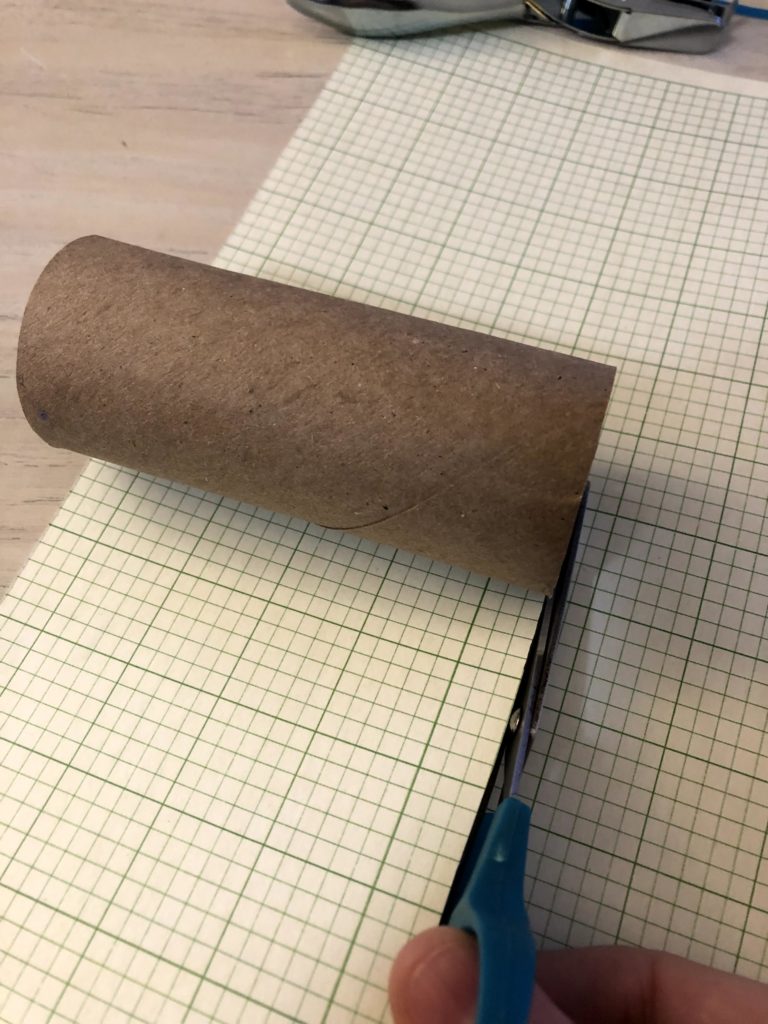
  1. Lay 1 toilet paper tube against the back of the paper and mark the length of the tube with a pencil
  2. Cut at your mark to create a long piece of paper that is as wide as the tubes
  3. Decorate the outside of the paper, if desired
  4. Turn paper pretty side down
  5. Use the glue stick to place glue all over the back of the paper
  6. Use the glue stick to place glue all over the tubes
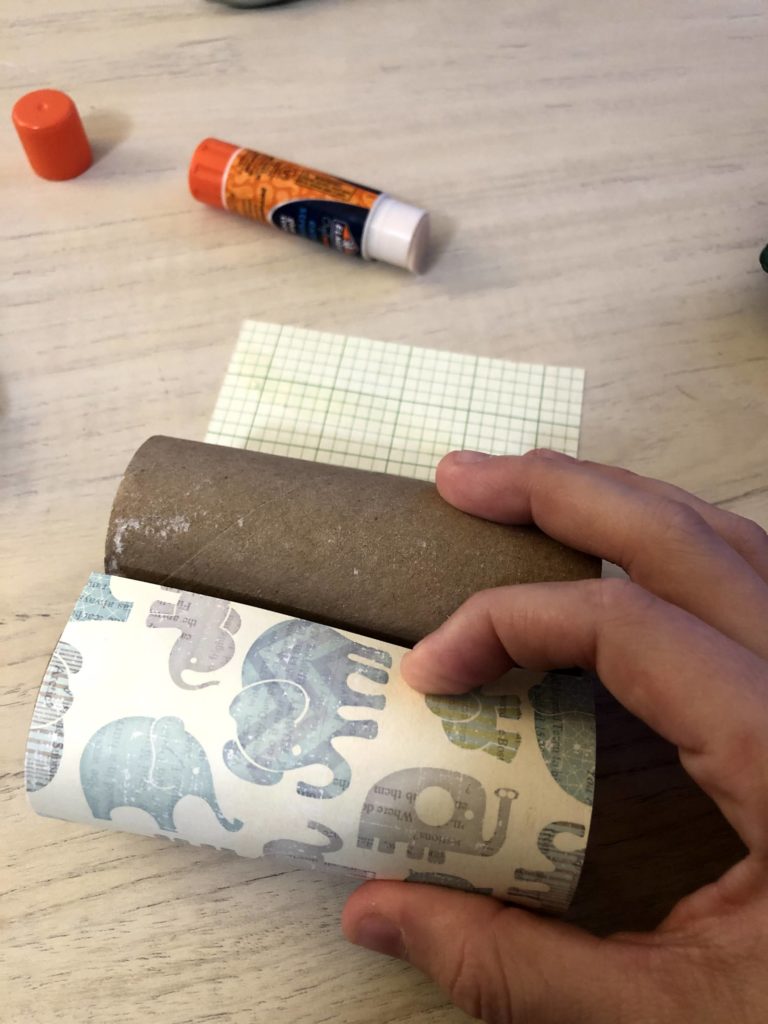
  7. Line up tubes with the edges of the paper and roll to cover the tubes
  8. Secure the seam with a piece of tape to hold everything in place as the glue dries
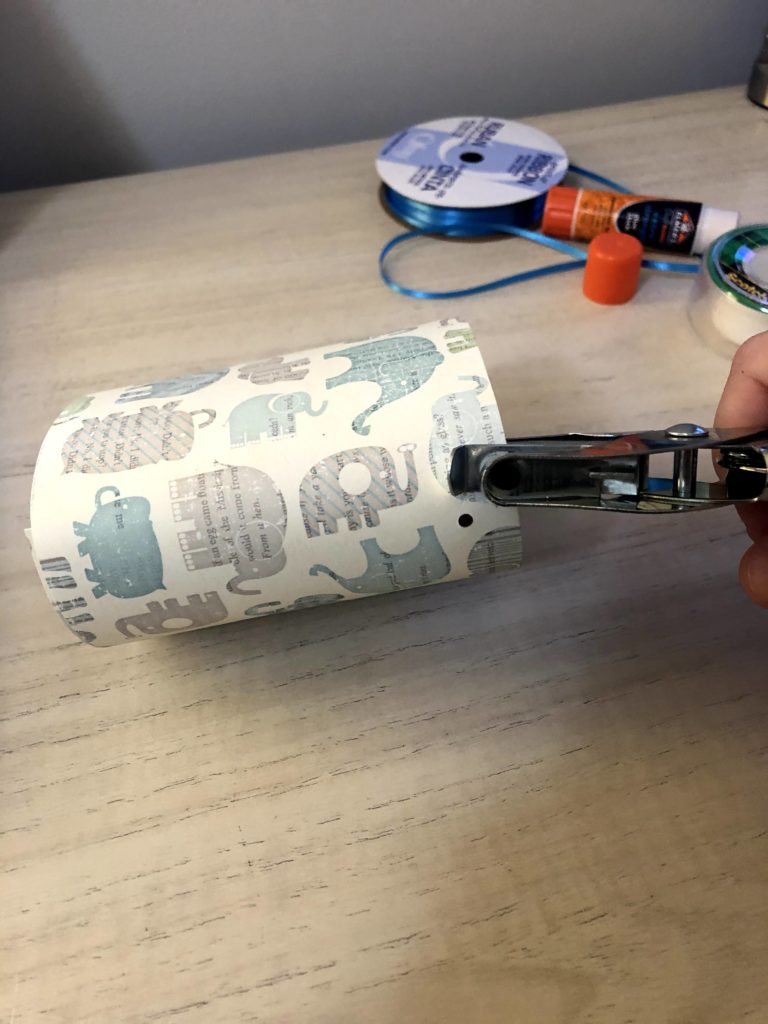
  9. Place a hole punch on one side for the string to go through
  10.  Place a hole punch in the same place on the opposite tube for the other string attachment
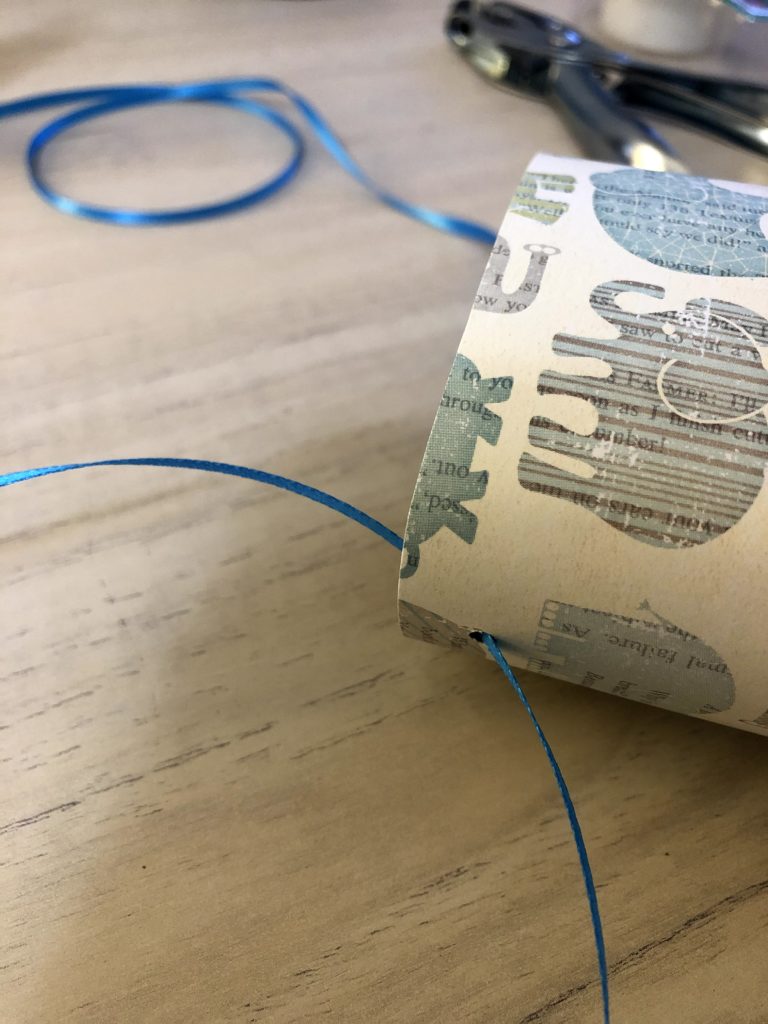
  11. Measure the length of string to your desired length
  12. Tie each end through the holes that are punched in the sides

stuffed animal with binoculars

Filed Under: Blog Tagged With: activities, Crafts, Stuffed Animal Safari, Super Science Days

May 16, 2020 by Kathleen

Sensory Bin Idea – Lady Bug Bin

We have a great sensory bin idea for you–create a Lady Bug themed Sensory Bin with materials you have at home!

What is a Sensory Bin?

Sensory bins are great tools for younger children or children who might have sensory processing disorders to experience some relaxed sensory learning activities. For example, a sensory bin might include textures that encourage fun or textures that you might want your child to get used to (like sand perhaps) as well as goaled learning activities, like foam letters or numbers. In this activity, we suggest including toy insects to learn more about bugs.

Make a Sensory Bin that resembles a lady bug and fill it with any red and black materials that may stimulate the senses. This craft lists red and black material examples to create a Lady Bug, but you can create any kind of bug play bin; for example, if you have mostly green things around the house or don’t like lady bugs as much, you can make a Grasshopper bin!

Needed to Make the Sensory Bin

  • 1 small/medium-sized bin
  • Scissors
  • Black & red constructions paper
  • Black and red markers
  • Black or red pipe cleaners
  • Tongs or measuring cups
  • tape

Ideas to Fill the Sensory Bin

  • Red and black dried beans or oats
  • Red and black pompoms
  • Hard pasta colored red or black
  • DIY red or black play-doh/slime
  • Red or black-colored rocks
  • Red and black-colored buttons
  • Small plastic insect toys

Fill your lady bug bin with any materials you’d like to explore. There are some red and black options listed above, but feel free to use anything you have available!

child holding rice from sensory bin in hands

Directions

  1. Using your scissors, markers, and pipe cleaners, create the 6 legs, 2 antennae, and the head of the ladybug.
  2. Tape down the antennae, legs, and head onto the small/medium-sized bin.
  3. Fill your lady bug with any of the materials listed above or substitutes as desired. You can make all items black and red to resemble a lady bug.
  4. Once your sensory bin is filled use tongs and measuring cups to help your child pick our specific materials like small plastic insects or insect toys! Get Creative and have fun with it!

We’ll be working on more sensory friendly content as soon as we can, find it on our Sensory Friendly Saturdays Page.

Sensory Friendly Saturday

For more activities to complete with your household, check our our Super Science Saturday Page.

Super Science Saturday

Filed Under: Blog Tagged With: activities, Bug Bonanza

May 13, 2020 by Kathleen

Butterfly Chromatography Craft

What is Chromatography?

Chromatography is a very easy to observe chemical process where one state of matter–in this chromatography craft (and for ancient Greek art forms!) ink or paint–gets dissolved by another state of matter–in this case, water.

What You Will Need for your Butterfly Chromatography Craft

  • Pipe Cleaners
  • Spray Bottle
  • Water
  • Coffee filters
  • Washable Markers
  • Drying station, somewhere to dry the butterflies

*Most of these items can be substituted for other items if you don’t have them. You can also use clothespins, twist ties, or paper towels to make your Butterfly chromatography craft instead!

Chromatography Craft materials
Colored coffee filter
spraying water onto colored coffee filter
finished chromatography craft

Directions

  1. Using your washable markers, draw an image or pattern on your coffee filters. This can be as complex or colorful as you’d like!
  2. Spray the coffee filter with water. Try not to use too much! You’ll see the colors begin to bleed almost immediately. Allow about 5-10 minutes to dry.
  3. Once fully dry, take two fingers and pinch the middle of the coffee filter to create a shape that looks like a bow. Carefully spread each side out to make them look fuller and wing-like.
  4. Use a pipe cleaner or clothespin to tie around the middle of the wings. Try to shape the ends of the pipe cleaner into antennae or attach some yarn or string to your clothespin.
  5. Your butterfly craft is finished! Be sure to show off your creations using the #MuseumsFromHome!
Try other Super Science Days Activities

Filed Under: Blog Tagged With: activities, Bug Bonanza

May 13, 2020 by Kathleen

Bugs Scavenger Hunt

Look in your backyard or around your neighborhood to find one of each of the invertebrates on our scavenger hunt below (we’re including slugs, snails, and worms on our list).

If you can’t get outside, watch the video to learn how to use iNaturalist to complete the scavenger hunt online.

Find One of Each Kind of Invertebrate!

Butterflies

Big and small, butterflies are some of the most impressive insects.  Look for them around flowers and near muddy ponds and puddles where they take a drink.

true bug

True Bugs

They’re insects that have wings and sucking mouthparts because they love the sap from plants.  Look for them in the garden, the field, or the forest.

bee

Bees and Wasps

Listen for these black and gold fans buzzing around flowers and fields. Some bees are active in the morning and others in the middle of the day.

spider

Spiders

These creepy-crawlies might hang out in your yard, the forest, or even your basement! Maybe you’ll find them feasting on insects.

beetle

Beetles

Some are black, but some beetles can be colorful like ladybugs. Beetles like forests, fields, and even collect pollen from flowers.

moth

Moths

These camouflaged insects tend to fly around at night, maybe you can find some near porch lights at night or napping on trees and buildings during the day.

fly

Flies

Flies sometimes get inside our houses, but they’re also pretty fond of flowers and wet places like streams, puddles, and ponds.

millepede

Many Legs

Look around for any kind of invertebrate with many legs like a millipede, centipede, or crayfish. They can be found in many habitats.

ant

Ants

Sometimes they come out in great numbers to bring food back to the colony. Ants live where they can find open soil to build their underground communities.

snail

No Legs

Worms like damp places like under rocks and logs but come out after a heavy rain. You might find snails and slugs hiding from the rain or eating plants in forests, fields, or gardens.

Filed Under: Blog Tagged With: activities, Bug Bonanza

May 12, 2020 by wpengine

Draw a Flower

This is the season of colorful flowers and we can truly appreciate their vibrance after a typical grey and chilly winter.  One way to make the beauty last and keep a reminder of springtime all year-round is to draw a flower.

Andrey Avinoff was an entomologist and Director of the Carnegie Museum of Natural History from 1926 to 1946.  But he was also an illustrator and painter in his free time!  Many of his beautiful illustrations can be found in “Wild Flowers of Western Pennsylvania and the Upper Ohio Basin,” a botanical guide authored by the botanist Otto E Jennings, and later Director of the Carnegie Museum of Natural History.

One of the most ubiquitous flowers of the season, for me, is the violet.  I love the way they sprout up through lawns and in the forest alike.  They come in a dazzling array of colors—pink, white, yellow, blue, and purple—and the detail when you look closely is inspiring.  There are about 600 species in the Viola genus, so there are plenty to choose from.

Before we get started you might need to gather some supplies.  Use a pencil and eraser, just in case you make some mistakes (it’s okay to make a mistake).  Get some paper and a comfy spot to draw—make sure you cover your table to avoid making marks on it.  Don’t forget the colors!  I like colored pencils, but you can use markers, crayons, paint, or anything else to color with.

Here’s a tip: try out some ideas on scrap paper so that you know what works best for you.  Practice makes perfect!

Step 1: Shapes

circles and lines drawn in pencil to show the basic shapes to begin drawing flowers

Use some basic shapes—circles, triangles, squares, and lines—to make up the general shape of your flower.  You can draw little lollipops or popsicles for now and we’ll add more details as we go.  Use light pencil strokes so that they’ll be easy to erase later.

Try to keep all of your flower shapes the same size—you want all your flowers to be similar in size.

I also draw some leaf shapes.  Make sure your leaves are balanced to your flowers and don’t worry about how they overlap just yet.

I also like to have a photo that I’ve taken or found online to use as a reference for what I’m drawing.  I even picked some flowers to get a good idea of what they look like—just make sure you leave some flowers for the wildlife.

If you want to take it to the next level, you can also check out some botanical illustrations (like Andrey Avinoff’s) where individual flower parts, seeds, leaves, and roots are sometimes drawn to help with identification.

Step 2: Silhouette

basic pencil drawing of flowers

Next let’s draw individual flower petals.  It’s good to know how many petals your flower has and how they look—violets have five that look a little like a butterfly.  Flowers come in a lot of shapes, so take some time studying the flower and practice drawing the shape.  If you haven’t already, you can also draw the flower stalks, or petioles.

The leaf shape is important too, leaves come in lots of shapes like the violet’s heart-shaped leaves.

Step 3: Details

detailed pencil drawing of flowers

Add more details.  Mark where colors might change on flower petals and if there are any veins on the leaves or petals.  You can add details to the leaf edges to make them wavy, scalloped, or toothed.

detail of pencil drawing of flowers

It’s also important in this step to know how detailed you want to be. Remember: a smaller sketch doesn’t need as much detail, but a bigger sketch can have more.  Whatever you think looks best.

detailed pencil sketch of flowers

Step 4: Color

colored drawing of flowers with purple petals, yellow centers, and green stems and leaves

This step is optional, sometimes a black and white sketch can tell a great story.  However, if you have some time, then adding color to your drawing can also really bring it to life.

You can use crayons, markers, paint, or any other color tool you want.  It’s always a good idea to test your colors on a separate piece of paper to see if they’re right for you or to try out a mix of colors.  Flowers are many colors, so you can be really creative!

Be proud of your sketches!  No one else could have made it the same way that you did.  By drawing and coloring plants, animals, and other nature you can sharpen your observation skills and gain a better appreciation for the beauty and uniqueness of all life.

Aaron Young is a museum educator on Carnegie Museum of Natural History’s Outreach team. Museum staff, volunteers, and interns are encouraged to blog about their unique experiences and knowledge gained from working at the museum.

Filed Under: Blog Tagged With: Aaron S. Young, activities, Education, Educators, Museum from Home, Nature 360, Nature Lab

May 12, 2020 by Kathleen

Create Bugs in Amber Slime!

Create your own slime using everyday household craft materials. Using toy insects, recreate what would happen to insects when they were caught in tree resin, fossilizing them. Great for kids who love Jurassic Park and fossils!

Borax Recipe

  • ½ cup of (preferably clear) PVA glue
  • ½ cup water (mix with glue)
  • ½ teaspoon borax powder
  • ½ cup warm water (Mix with Borax)
  • 5-10 drops of yellow food coloring or substitute
  • Measuring cups & spoons
  • 2 medium-sized bowls
  • Insect toys

Non-Borax Recipe

  • ½ cup of (preferably clear) PVA glue
  • ½ cup water
  • 1 tbsp. saline solution (must contain boric acid and sodium borate!)
  • ¼-½ tsp. baking soda
  • 5-10 drops of yellow food coloring
  • Measuring cups & spoons
  • 2 medium-sized bowls
  • Small plastic insect toys
yellow slime with glitter

Did you know, in 2017, the museum received a collection of prehistoric ticks trapped in amber called “Dracula’s Terrible Tick?”

Read about Dracula’s Terrible Ticks!

Directions for Borax Recipe

  1. Mix ½ cup of water and ½ cup of glue in bowl.
  2. Add 5-10 drops of food coloring to glue mixture.
  3. Mix ¼ tsp. of borax and ½ cup warm water in a separate bowl. Stir until completely mixed in.
  4. Add the borax and water mixture slowly to your glue and water mixture. Start stirring immediately! Your slime will soon start to form immediately. 
  5. Keep mixing until slime has formed. immediately take out and put in the dry container.
  6. Continue to stir any leftover liquid until it turns into slime. Transfer it to the dry container once you are done.
  7. Start kneading your slime mixture and add pretend insects! It may feel stringy at first but will change in texture the more it is kneaded. 

Directions for Non-Borax Recipe

  1. Put ½ cup of glue in bowl.
  2. Mix ¼-½ tsp. baking soda and ½ cup water in a bowl until baking soda is completely dissolved.
  3. Add 5-10 drops of food coloring to baking soda and water mixture.
  4. Gently mix both glue and food-colored mixture.
  5. Add 1 tbsp. saline solution and stir quickly until slime starts to form,  
  6. Put a few drops of saline solution on hands and start to knead slime together
  7. Add pretend insects, and you’ve created your own amber slime!

Want to keep the slime you’ve created longer? Keep it in the fridge!

Filed Under: Blog Tagged With: activities, Bug Bonanza

  • « Go to Previous Page
  • Page 1
  • Page 2
  • Page 3
  • Page 4
  • Page 5
  • Go to Next Page »

sidebar

About

  • Mission & Commitments
  • Directors Team
  • Museum History

Get Involved

  • Volunteer
  • Membership
  • Carnegie Discoverers
  • Donate
  • Employment
  • Events

Bring a Group

  • Groups of 10 or More
  • Birthday Parties at the Museum
  • Field Trips

Powdermill

  • Powdermill Nature Reserve
  • Powdermill Field Trips
  • Powdermill Staff
  • Research at Powdermill

More Information

  • Image Permission Requests
  • Science Stories
  • Accessibility
  • Shopping Cart
  • Contact
  • Visitor Policies
One of the Four Carnegie Museums | © Carnegie Institute | Privacy Policy | Terms of Use | Accessibility
Rad works here logo