• Skip to primary navigation
  • Skip to main content
  • Skip to primary sidebar

Carnegie Museum of Natural History

One of the Four Carnegie Museums of Pittsburgh

  • Visit
    • Buy Tickets
    • Visitor Information
    • Exhibitions
    • Events
    • Dining at the Museum
    • Celebrate at the Museum
    • Powdermill Nature Reserve
    • Event Venue Rental
    • Gift Cards
  • Learn
    • Field Trips
    • Educator Information
    • Programs at the Museum
    • Bring the Museum to You
    • Guided Programs FAQ
    • Programs Online
    • Climate and Rural Systems Partnership
  • Research
    • Scientific Sections
    • Science Stories
    • Science Videos
    • Senior Science & Research Staff
    • Museum Library
    • Science Seminars
    • Scientific Publications
    • Specimen and Artifact Identification
  • About
    • Mission & Commitments
    • Directors Team
    • Museum History
  • Tickets
  • Give
  • Shop

Education

April 29, 2020 by wpengine

A Walking Tour of Blooming Trees in Pittsburgh

I live within walking distance of the Carnegie Museum of Natural History in the neighborhood known as Squirrel Hill. One of my favorite things about living in this neighborhood is springtime – more specifically all of the beautiful blooms. I decided to practice my picture taking skills for the upcoming City Nature Challenge, while staying socially distant from neighbors, by taking a walking tour of the blooming trees of Squirrel Hill. Let’s see what I found.
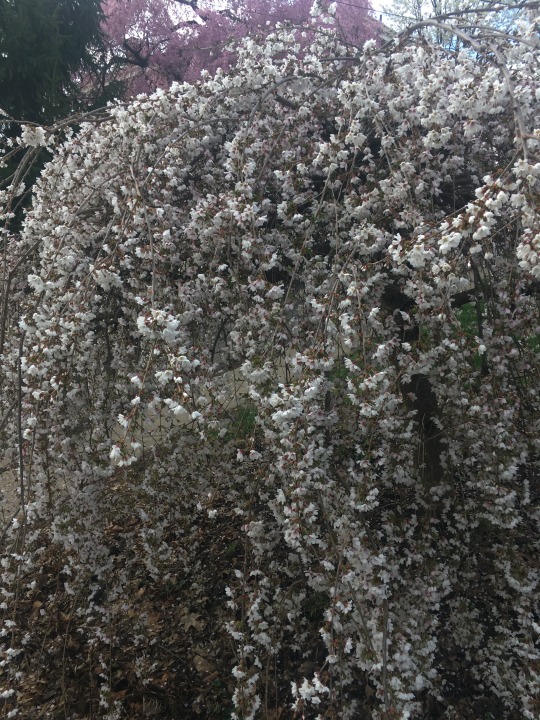
This tree is most likely an almond tree, based on the flower shape and colors. For some trees it is easier to identify them from their leaves, but this early in the year the tree doesn’t have any yet. I used my handy iNaturalist app to help me out with initial identification. While I don’t know for sure if it is in fact an almond tree and not a plum or something similar, now that I have posted it on the app, hopefully someone else will correct or verify the identification in the future.
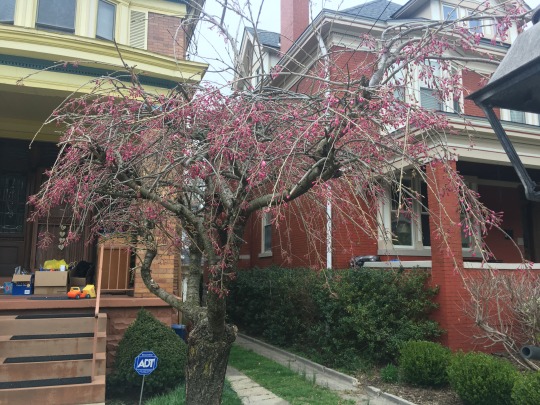
Like the almond tree and this weeping cherry tree, most of the flowering trees in the neighborhood are fruit trees that individuals planted in their yards. This is important to remember when uploading information to iNaturalist, especially during the City Nature Challenge. When I uploaded these images I clicked on the button “Captive / Cultivated” to make sure that it is documented that these trees were purposefully planted by people and would not grow native here in Pennsylvania. While there is nothing wrong with adding non-native plants to our yards, it’s important for people using the data on iNaturalist that we include that information.

My last stop on the neighborhood tour is one of my very favorites: my neighbor’s giant magnolia tree. I recently found out that magnolia trees are a very ancient group of flowering plants, and they evolved to be pollinated by beetles instead of bees! There are a couple of characteristics that show that they were adapted for this type of pollination, including their flower color and size, and a special covering over their seeds to protect them from beetle mouthparts. This lineage of trees is so old that Tyrannosaurus rex and other late Cretacous dinosaurs walked past its relatives. Next time you visit the museum keep an eye out for a tree in Dinosaurs in Their Time that looks a lot like our magnolias today.
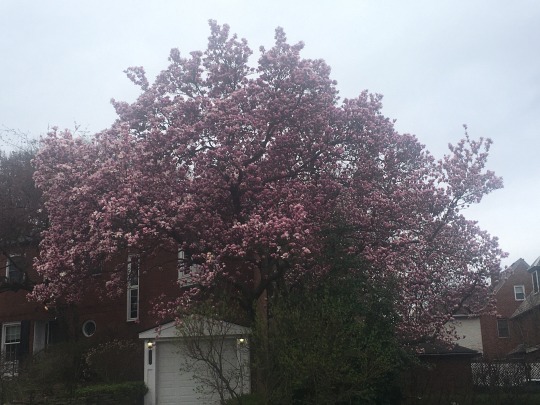
As spring continues the neighborhood will start to look different. All these shades of white and pink will turn to green as the trees grow their leaves and new blooms closer to the ground will take their place. I’m excited to go for more walks and document more nature!

You can learn more about magnolias from the Magnolia Society.

Jenise Brown is a Museum Educator with Carnegie Museum of Natural History. Museum staff, volunteers, and interns are encouraged to blog about their unique experiences and knowledge gained from working at the museum.
Filed Under: Blog Tagged With: City Nature Challenge, Education, Museum from Home, Nature Lab

April 29, 2020 by wpengine

How-to Draw a Squirrel

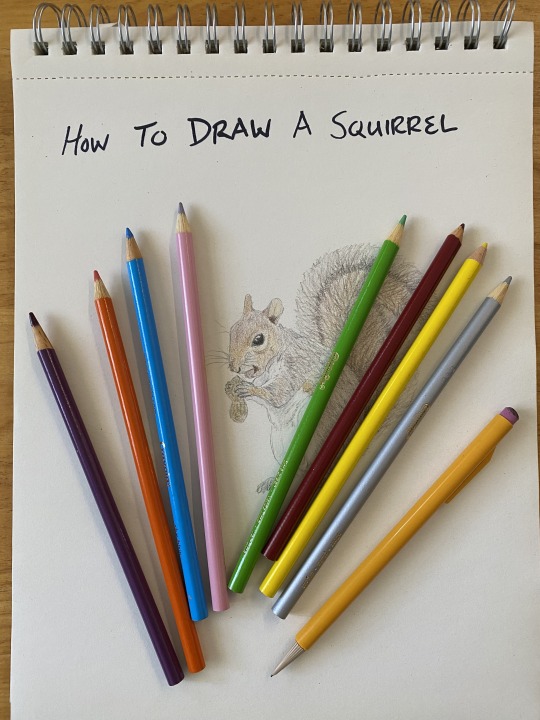
If Pittsburgh had an animal mascot, I think it would be a squirrel.  So, let’s draw a squirrel together.

Early naturalists, explorers, and scientists didn’t have cameras to take photos of the animals and plants that they saw.  Instead they would draw them so that they could show fellow scientists and the public what kinds of new species they discovered.

One of the many squirrels that live in our area is the gray squirrel.  Gray squirrels usually have a grayish or brownish back and a white belly.  Some gray squirrels are melanistic—that means that they’re all black—and we call them black squirrels, but they’re actually a gray squirrel.

Before we get started you might need to gather some supplies.  Use a pencil and eraser, just in case you make some mistakes (it’s okay to make a mistake).  Get some paper and a comfy spot to draw—make sure you cover your table to avoid making marks on it.  Don’t forget the colors!  I like colored pencils, but you can use markers, crayons, paint, or anything else to color with.

Here’s a tip: try out some ideas on scrap paper so that you know what works best for you.  Practice makes perfect!

Step 1: Shapes

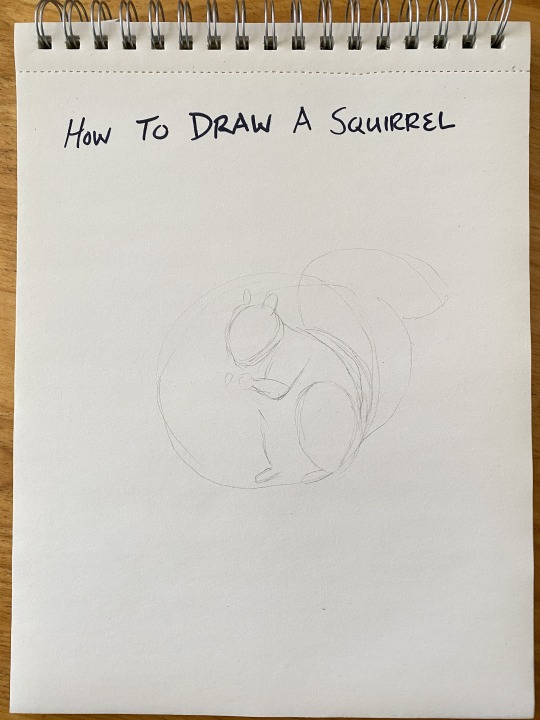
Use some basic shapes—circles, triangles, squares, and lines—to make up the general shape of what you want to draw.  Use light pencil strokes so that they’ll be easy to erase later.

Try to keep all of your shapes balanced to one another—you don’t want your squirrel to have a huge head!

I started by drawing a big circle, like a boundary zone, to keep all of the other shapes from getting too big.  It doesn’t have to be a perfect circle; we can erase it later.

I also like to have a photo that I’ve taken or found online to use as a reference for what I’m drawing.

If you want to take it to the next level, you can also check out some anatomical and skeletal models of squirrels or other animals online to understand more about their muscle and bone structure.

Step 2: Silhouette

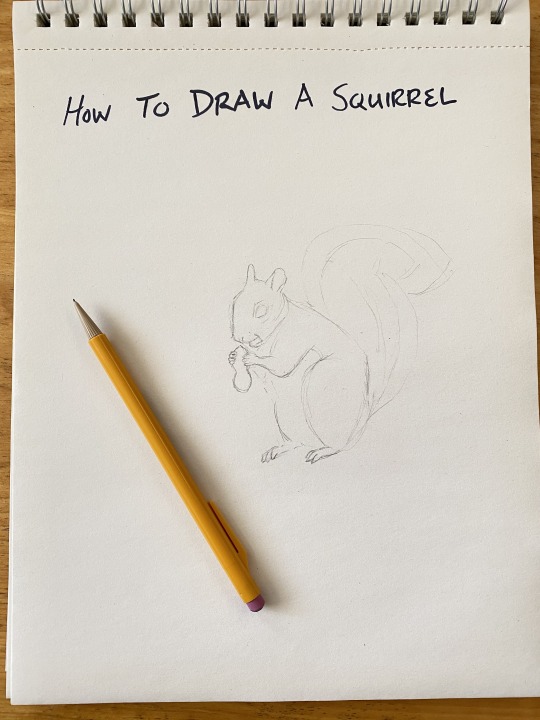
Next let’s connect our shapes so that we can have a good outline of our subject.  You can add eyes and some of the rough edges.  Try to zone out where your colors will change too—for instance the squirrel’s white belly will be different than its greyish brown back, so I’ll add a line to mark that.

We can also erase that boundary zone circle we made earlier, unless you want to add a colored background for your squirrel.

Let’s also give our squirrel a nut to eat.

Step 3: Details

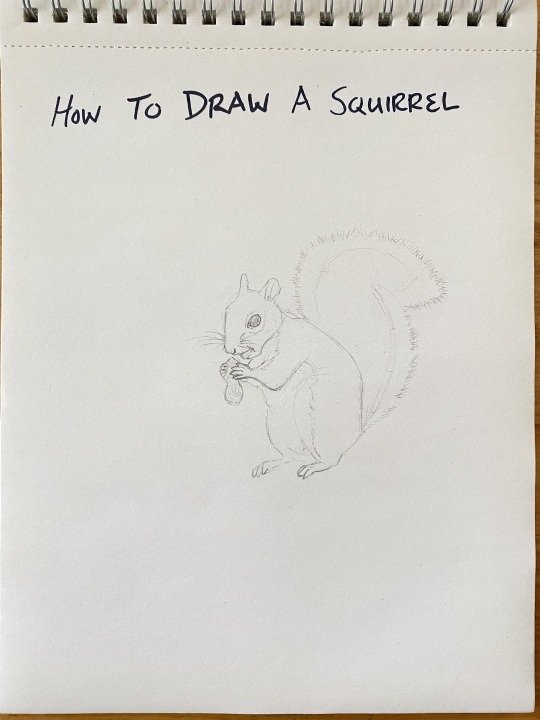
Add more details.  Add some furriness to the body, add in details on the ears and face—including some whiskers, and make that tail really fluffy.  You can also erase some of those shapes we made in step 1 and feel free to make a few changes to balance it all out if you want to.

It’s also important in this step to know how detailed you want to be.  Remember: a smaller sketch doesn’t need as much detail, but a bigger sketch can have more.  Whatever you think looks best.

Step 4: Color

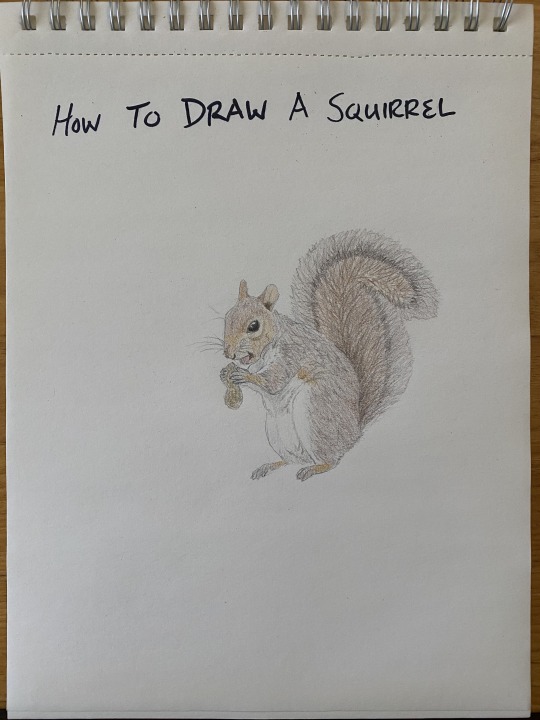
This step is optional, sometimes a black and white sketch can tell a great story.  However, if you have some time, then adding color to your drawing can also really bring it to life.

You can use crayons, markers, paint, or any other color tool you want.  It’s always a good idea to test your colors on a separate piece of paper to see if they’re right for you or to try out a mix of colors.  Squirrels that live in North America are usually brown, black, red, or gray, but there are very colorful squirrels in the tropics. Have fun with it!

Be proud of your sketches!  No one else could have made it the same way that you did.  By drawing and coloring plants, animals, and other nature you can sharpen your observation skills and gain a better appreciation for the beauty and uniqueness of all life.

Aaron Young is a museum educator on Carnegie Museum of Natural History’s Outreach team. Museum staff, volunteers, and interns are encouraged to blog about their unique experiences and knowledge gained from working at the museum.
Filed Under: Blog Tagged With: activities, City Nature Challenge, Education, mammals, Museum from Home

April 29, 2020 by wpengine

Egg Carton Seed Starter

If you’re anything like me, then you love eating eggs.  Fried, scrambled, boiled, poached, even pickled!  So, let’s take all those leftover egg cartons and do something fun.

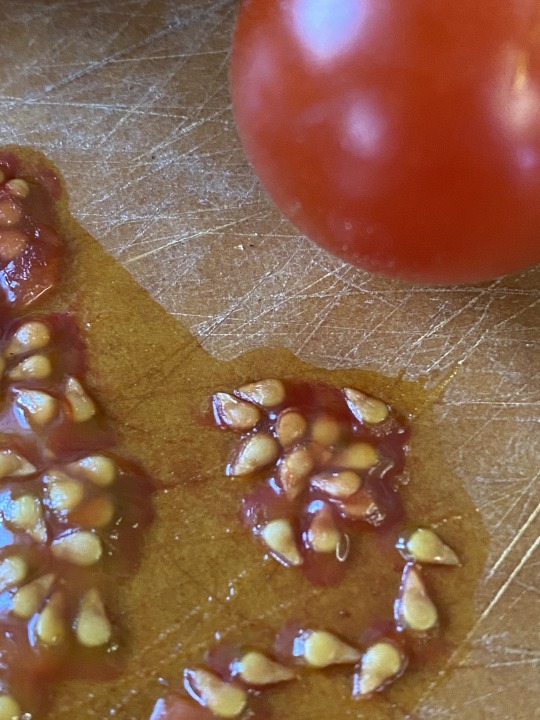
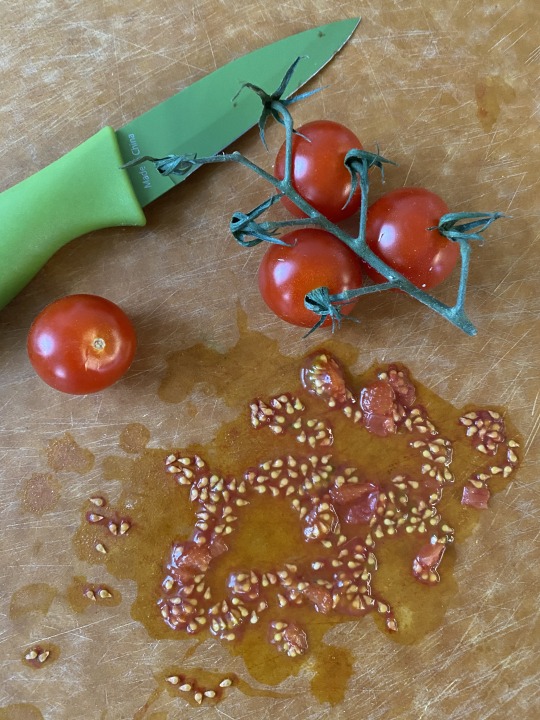
Another food I love is tomatoes.  Sometimes when I cut up tomatoes, I get a bunch of seeds left on the cutting board.  You can take those seeds or try some other vegetable or fruit seeds to start in an egg carton seed starter.  I like to use tomatoes because they’re easy to grow and don’t take up too much space in the garden.

A quick note about growing seeds from fruits and vegetables:  Most of the time seeds that come from fruits and vegetables that we eat aren’t as successful as the seeds that come from a packet.  For example, seeds from a big beefsteak tomato might turn out to make smaller tomatoes.

Before we get started, we’ll need some supplies.  Find some tomatoes (any variety) and cut them up for a BLT or a snack—we need some of those seeds.  Always ask an adult to help out with a knife.  We also need an egg carton and some soil.

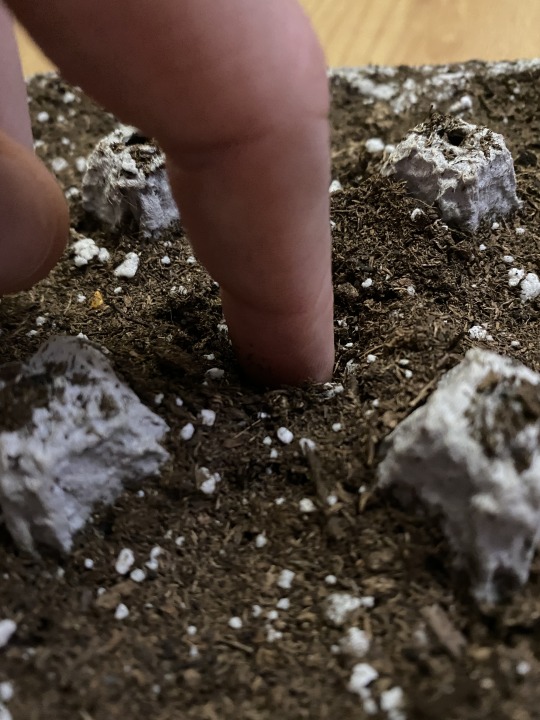
Let’s fill that egg carton with soil and gently pack it down.  You can use any gardening or potting soil.  Make sure there’s at least one to two inches of soil.  Poke the tip of your finger in the soil in each egg cup to make a hole—the hole doesn’t need to be deep.  You can put two or three seeds in each hole (make sure the seeds don’t touch) and then cover them up loosely.  Once all of your holes are filled in, you can gently sprinkle water over them until they’re really wet.

Set your egg carton in a plastic dish or on a plate to keep water from dripping out and place your planted seeds inside where they’ll be warm.  Keep an eye on them to make sure the soil doesn’t dry out too much.  Only water when the soil feels dry on top and watch out for mold growth—you can scoop the mold out of the soil if you see it.

After a week you might see little tomato plants poking up from the soil.  Make sure they get lots of light in a south-facing window.  You should plant them up to a bigger pot or into the garden when they’re about two or three inches tall.  Just cut or tear the carton away.

This is a fun way to reuse waste and to grow your own food.  It’s also a ton of fun to watch plants grow from a little seed into a big bush filled with fruit.  And what a reward that will be!

A few tips on tomato plants:

·      You can pinch off a few of your tomato seedlings so that there’s one strong one in each cup—tomatoes need a strong root system and don’t do well with too much competition.

·      Plant tomatoes or place potted tomatoes where they get at least six hours of direct sunlight.

·      When you plant them up, use a big, deep pot, like a five-gallon bucket with holes for drainage.  Plant the stem into the soil so the root system can really jump out.

·      Fertilize or provide rich compost, tomatoes love good soil.  Water your plants if the soil feels dry or if the plants look droopy.

Aaron Young is a museum educator on Carnegie Museum of Natural History’s Outreach team. Museum staff, volunteers, and interns are encouraged to blog about their unique experiences and knowledge gained from working at the museum.
Filed Under: Blog Tagged With: activities, Education, Museum from Home

April 6, 2020 by wpengine

Make Your Own Thermometer

What’s the first thing you do before going to bed or upon waking up in the morning? For many people, it’s checking the weather. This simple activity sets the tone for the rest of your day. It will determine the outfit you wear, whether you walk or ride the bus and so much more. It can be as easy as checking an app or watching the morning news, but where’s the fun and excitement in that? With a little effort, you can make your very own thermometer that will provide an up-to-the-minute indoor or outdoor temperature, depending on where you leave it.

What You’ll Need

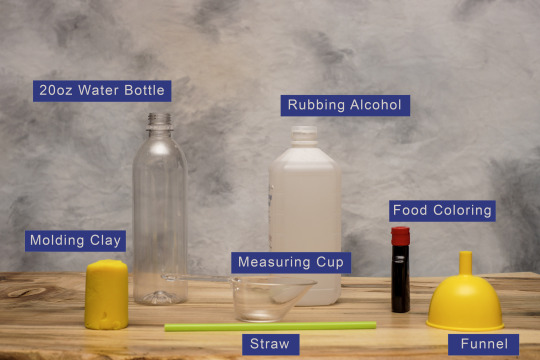
·        A 20 ounce plastic soda bottle

·        A small funnel

·        Water

·        Rubbing alcohol

·        Food coloring

·        Straw

·        Modeling clay

·        Permanent marker

·        Bowl of hot (but not boiling!) water

·        Bowl of ice

Directions

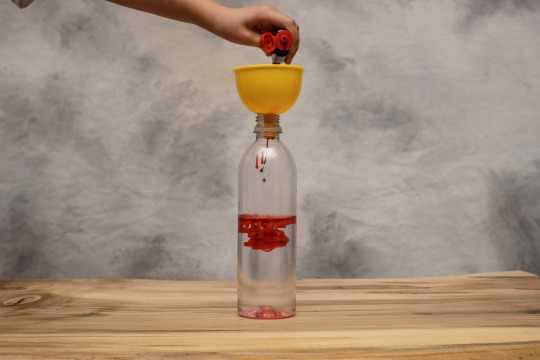
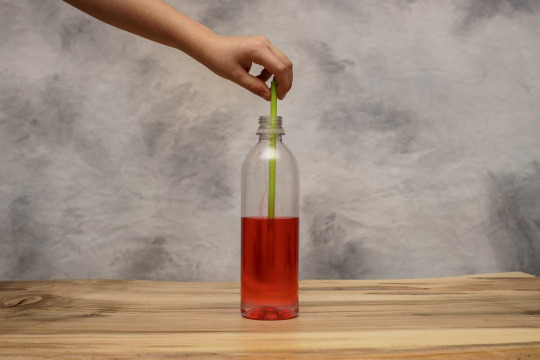
Fill your bottle halfway with 5 ounces (a little more than half a cup or about 150 ml) of water and an equal amount of rubbing alcohol.

Add a few drops of food coloring to the mixture. About 1-3 drops should do the trick!

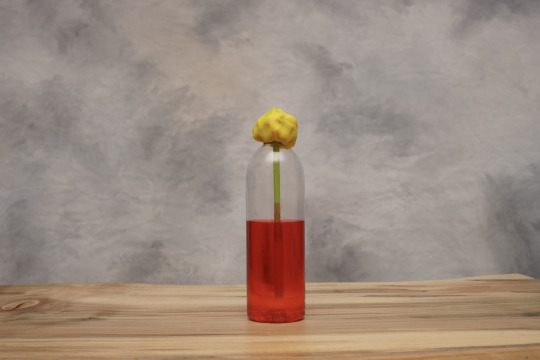
Now drop your straw into the bottle, but don’t let it rest on the bottom. Doing so will block the mixture from entering the straw. Leave a little bit of room so that the straw can fill. Wrap the modeling clay around the opening at the top of the bottle to create a seal. Do not cover the top opening of the straw. Try and keep the straw centered inside the bottle.

It’s time to calibrate your temperatures. You can use the store-bought thermometer for this. Start at room temperature and look for the highest point of the liquid in your straw. Mark that spot’s temperature on the bottle. Then set the bottle in a bowl of hot (but not boiling!) water and mark that temperature. Lastly, set the bottle in a bowl of ice and wait two minutes. Mark that temperature on your bottle.

Now you have cold, moderate and warm temperatures on the bottle. When you wake up tomorrow morning, use your new thermometer to see what the temperature is like!

So how does this work? 

Well, the warmer temperatures cause the liquids to expand. This forces the liquid up the straw, the same way that mercury moves in a thermometer you would buy at the store. In colder temperatures, the opposite happens and the liquid contracts and slides back down the straw.

Fun Fact

The first medical thermometer was invented by Sir Thomas Allbutt in 1867. It could take a person’s temperature in about five minutes. Do you think you could wait that long?

Learn more with Nature Lab. 

Filed Under: Blog Tagged With: activities, Education, Museum from Home, Nature 360, Nature Lab

April 2, 2020 by wpengine

Rabbit Bone Reward

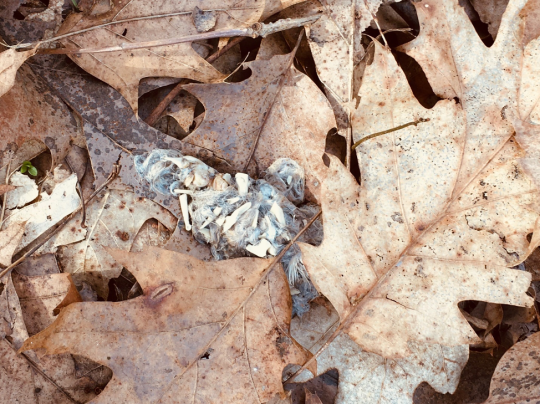
During a mid-March search for a great horned owl nest in an Allegheny County park, a loose jumble of rabbit bones and fur served as a consolation prize. On a mile-long hike that lacked a definitive owl sighting, the rabbit remains were at least evidence of the big winged predator’s recent presence.

Owls swallow their prey whole or in large chunks. After chemical processing within an owl’s stomach separates digestible tissue from bones, teeth, fur, and feathers, these indigestible elements are compressed into a pellet and coughed-up.

The rain-dissected pellet rested on an oak-leaf cushion directly below a 12-foot high trail-crossing branch that might well have been the owl’s cough-up perch.  As I imagined a well-fed owl occupying the perch, I recalled a challenge distilled through the wide-ranging conversations of the museum’s recent 21st Century Naturalist Project: How can all who utilize natural history collections routinely summon the imagination necessary to link individual specimens with the environments that once sustained them?

The energy flow represented just by the tiny bundle of white bone and blue-gray fur, for example, ran back in time to the rabbit and all the plant growth that nourished it, and infinitely forward to an owl then incubating eggs of another generation on a hidden nest.

For more information about owl pellets please visit:

https://www.allaboutbirds.org/news/what-are-owl-pellets

Patrick McShea works in the Education and Visitor Experience department of Carnegie Museum of Natural History. Museum employees are encouraged to blog about their unique experiences and knowledge gained from working at the museum.
Filed Under: Blog Tagged With: Education, Museum from Home, Patrick McShea

April 1, 2020 by wpengine

Draw a Bird!

Have you been spending a lot of time looking out your window?  I have and I’ve decided to do something about it.  So, let me show you how to draw the birds that you see.

Illustrating or drawing nature is a method that some scientists use while taking notes.  Sometimes a photo doesn’t always capture the details that a scientist wants to make notes about, so they’ll draw an animal, plant, insect, or even a whole scene in order to fully record what is happening.  It’s also fun to make a sketch of your favorite flower or animal.

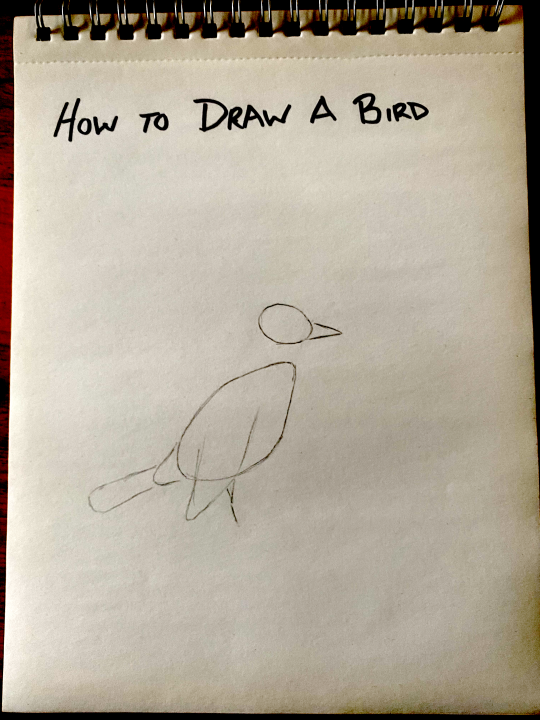
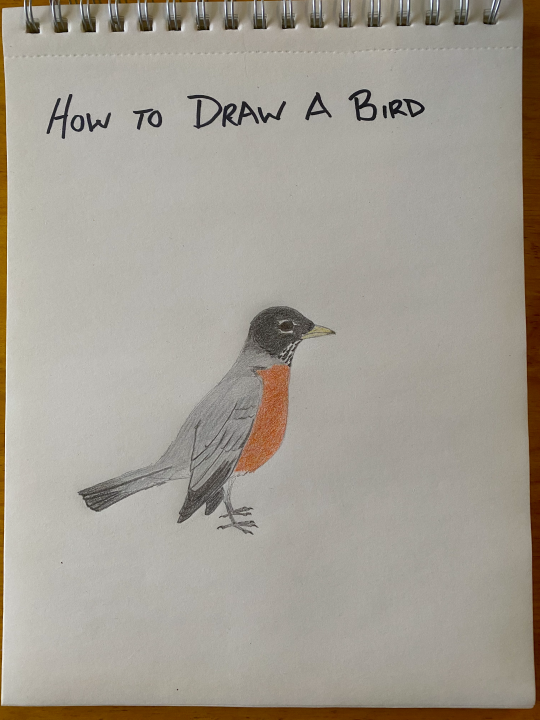
This time of year, there are a lot of robins around my neighborhood, so I’ll show you how I created this sketch of one and you can follow along too.

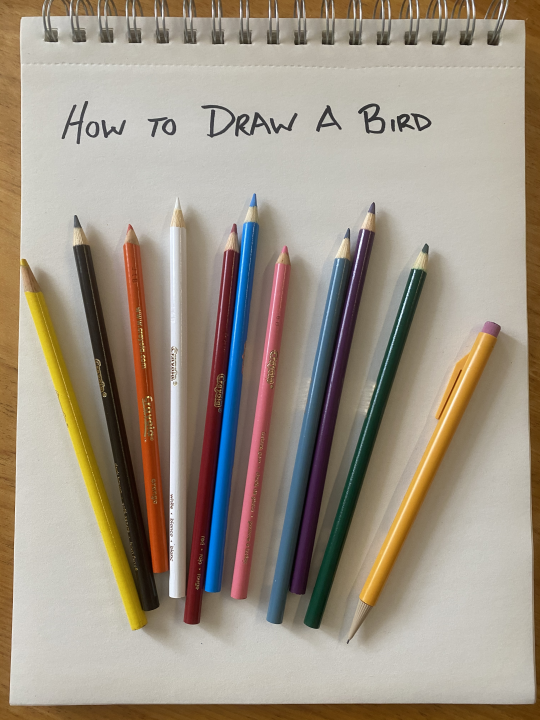
Before we get started you might need to gather some supplies.  Use a pencil and eraser, just in case you make some mistakes (it’s okay to make a mistake).  Get some paper and a comfy spot to draw—make sure you cover your table to avoid making marks on it.  Don’t forget the colors!  I like colored pencils, but you can use markers, crayons, paint, or anything else to color with.

Step 1: Shapes

Use some basic shapes—circles, triangles, squares, and lines—to make the general shape of what you want to draw.  Use light pencil strokes so that they’ll be easy to erase later.

Try to keep all of your shapes balanced to one another—you don’t want your bird to have a huge head!  I like to use a photo that I’ve taken or found online to use as a reference for what I’m drawing.

If you want to take it to the next level, you can also check out the different field marks on a bird.

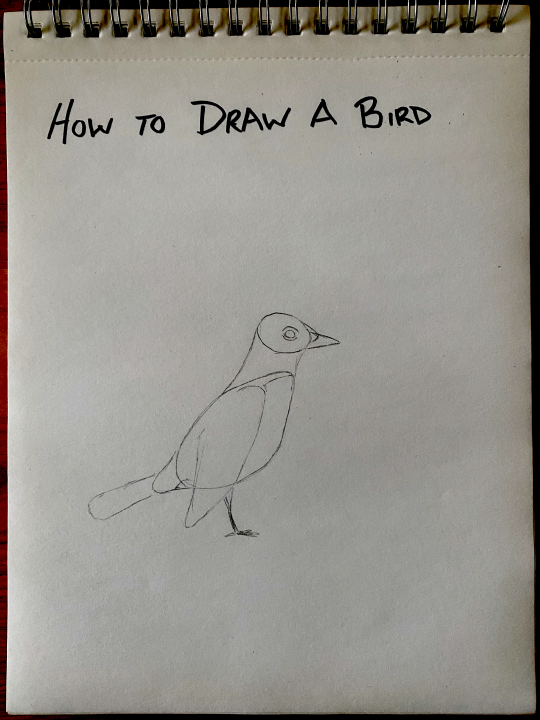
Step 2: Silhouette

Next let’s connect our shapes so that we can have a good outline of our subject.  You can add eyes and some of the rough edges.  Try to zone out where your colors will change too—for instance the robin’s red belly will be different than its grey back, so I’ll add a line to mark that.

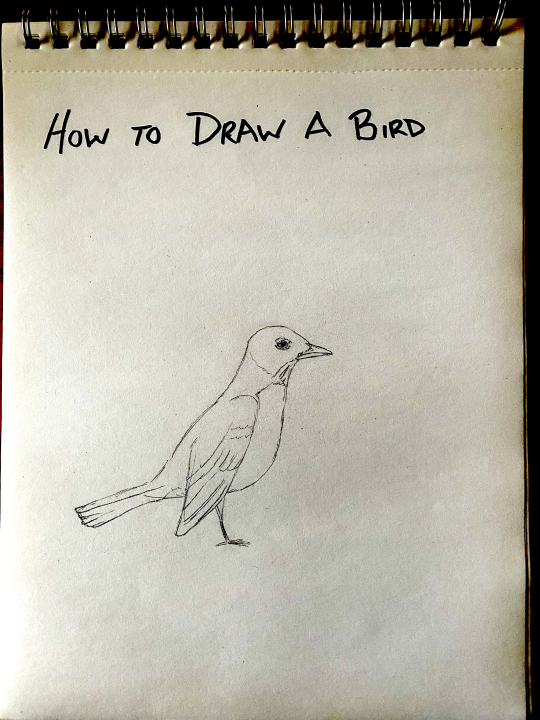
Step 3: Details

Add more details.  Add feathers on the wing and tail, add in details on the beak, head, and eye.  You can also erase some of those shapes we made in step 1 and feel free to make a few changes to those shapes if you want to.

It’s also important in this step to know how detailed you want to be—sometimes simple is good.  If your sketch is small, then less details might be better, but if your sketch is big, then you can add lots of little details.  It’s up to you!

Step 4: Color

This step is optional, sometimes scientists will just write down what colors they noticed because they can’t always carry around a whole art kit.  However, if you have some time, then adding color to your drawing can really bring it to life.

You can use crayons, markers, paint, or any other color tool you want.  It’s always a good idea to test your colors on a separate piece of paper to see if they’re right for you or to try out a mix of colors.  Birds can be lots of different colors!

Be proud of your sketches!  No one else could have made it the same way that you did.  By drawing and coloring plants, animals, and other nature you can sharpen your observation skills and gain a better appreciation for the beauty and uniqueness of all life.

Aaron Young is a museum educator on Carnegie Museum of Natural History’s Outreach team. Museum staff, volunteers, and interns are encouraged to blog about their unique experiences and knowledge gained from working at the museum.
Filed Under: Blog Tagged With: activities, Birds, Education, Museum from Home

  • « Go to Previous Page
  • Page 1
  • Interim pages omitted …
  • Page 9
  • Page 10
  • Page 11
  • Page 12
  • Page 13
  • Interim pages omitted …
  • Page 15
  • Go to Next Page »

sidebar

About

  • Mission & Commitments
  • Directors Team
  • Museum History

Get Involved

  • Volunteer
  • Membership
  • Carnegie Discoverers
  • Donate
  • Employment
  • Events

Bring a Group

  • Groups of 10 or More
  • Birthday Parties at the Museum
  • Field Trips

Powdermill

  • Powdermill Nature Reserve
  • Powdermill Field Trips
  • Powdermill Staff
  • Research at Powdermill

More Information

  • Image Permission Requests
  • Science Stories
  • Accessibility
  • Shopping Cart
  • Contact
  • Visitor Policies
Stay in the loop! Sign up for our newsletter(s).
One of the Four Carnegie Museums | © Carnegie Institute | Privacy Policy | Terms of Use | Accessibility
Rad works here logo